This is a super NSFW tutorial on how I brought my Karl character from DAZ Studio over into Blender. It’s NSFW because Karl is effectively an android gigolo (“hustler”, “rent boy”, “male prostitute”, etc.)
The character consists of a G8M figure with 4 geografts on each of his arms and legs, geograft genitals (Dicktator), a geoshell for the genitals, a geoshell for the head, and a geoshell for the torso, as well as separate hair, separate eyebrows, separate eyelashes, separate facial hair “scruff”, and separate pubic hair.
We’re going to take all that and bring it on into Blender using Diffiemorphic’s DAZ Importer Script.
And since I absolutely hate YouTube video tutorials, I’m putting this together in case you hate those videos just as much as I do. ![]()
Before we begin, you may want to familiarize yourself with my DAZ Studio to Blender by way of Diffiemorphic post for an introduction to Diffiemorphic’s add-on and how to install it.
Update: 2021-11-08 – I had to revise the instructions below to correct an issue that was preventing Dicktator from being posable. Unfortunately the problem is introduced as soon as you go to import the DAZ Figure into Blender in the very beginning. Which sucks.
Introduction
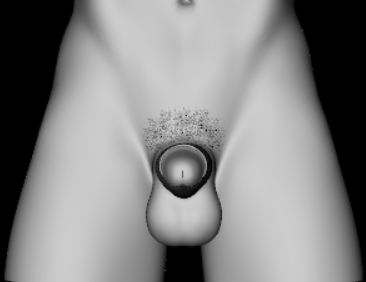
This is Karl:
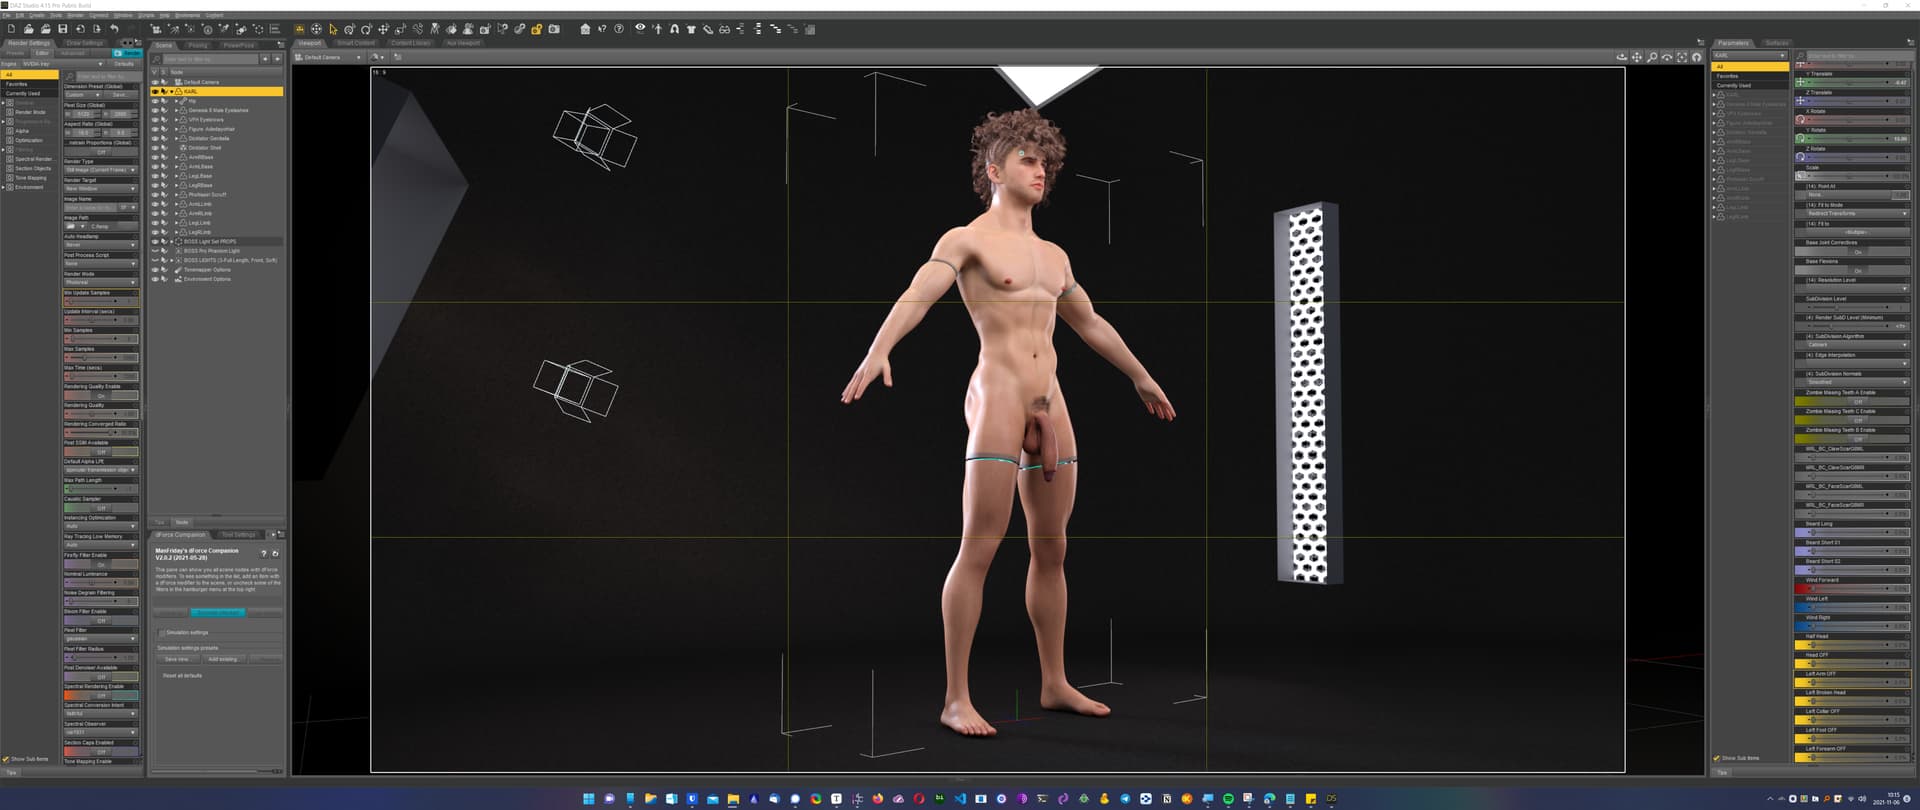
He’s an OC in one of my stories. He’s an android and is based on Karl for G8M by Sithlord Sims (with heavy morph dial customizations). Custom Geoshell for the face and torso inspired by Lexa Kiness’ Parcel & Paige characters (which are themselves inspired by Detroit Become Human).
Geografts for the arms & legs using Pixelsploiting’s amazing Plugin Limbs for G8M.
His hair is Adedayo Hair by Afrodite-Ohki.
Facial hair is from PHX Nasiri.
And his pubic hair is from SF-Design.
So we’ve got (5) geografts, (7) geoshells, (4) separate pieces of hair, and (4) props. Whew!
Make all your figures' props and geografts children of your main figure.
It’s important that everything that is part of your figure is a child of your figure. Sometimes it helps to make some objects their own top-level object, especially if you want to make an object visible or not. But this will cause problems in Blender. So, if you haven’t already done so, move every prop and every object under your figure’s top-level group:
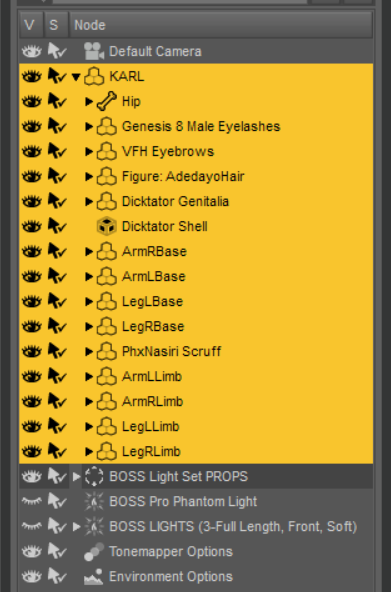
For example, in Studio I used to have Karl’s limbs as separate top-level objects so I could easily hide them or reposition them away from the body but this causes endless problems in Blender.
So, moving the limbs (which are separate rigged props) under the top-level “KARL” group just makes things easier.
Fix the the poses
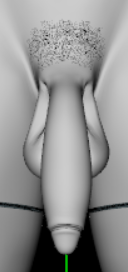
While my Karl figure is already in an A-Pose, one of his geografts (his Dicktator genitals) are actually not:

If we examine the geograft and look at the currently used parameters we can see what all has been dialed in:

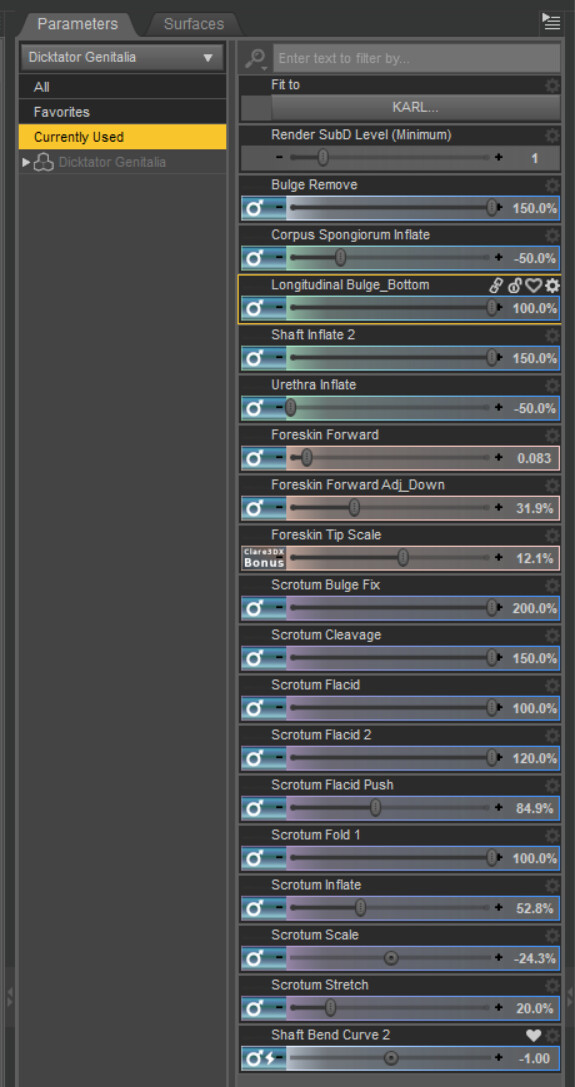
Here is where a little foreplanning comes in handy.
Anything that is dialed-in here will be carried over into Blender and will become the default shape for the objects. Which means, any morphs (Blender calls them “Shape Keys”) will affect something that has already been dialed-in.
Trust me, this will cause endless problems.
My recommendation is, especially for something that might be posed or morphed later, is to zero out the object’s shape and pose. Just make a note of the dial settings you’ve used and you can pretty faithfully dial everything back-in once you’re in Blender.
So for this example, I’m going to reset the figure’s shape and pose so everything is at “0” when I bring this into Blender.
Plus, the shaft is bent down (“Shaft Bend Curve 2”) because DAZ Studio doesn’t have the concept of soft-body physics. But Blender does! And with a very cheap add-on for Blender that I’ll show you a little later you can achieve some amazing results that are simply impossible to achieve within Studio.
But for now, let’s zero the genitals:

Note, I have the Dicktator genitals selected, and not the main figure, Karl.
When you’ve done that, everything should be completely reset:
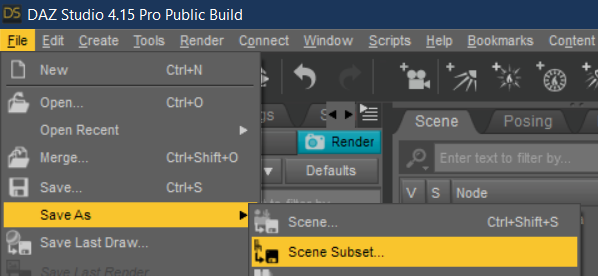
Save your figure out as a Scene Subset
Next we want to save the figure out as a Scene Subset:
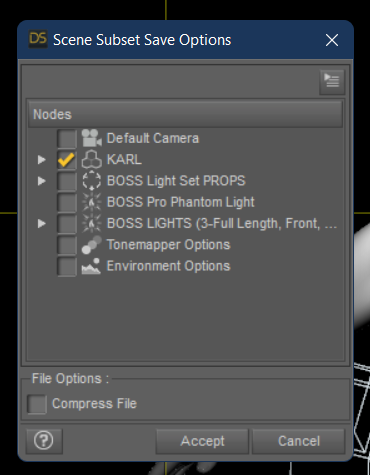
Make sure only your figure is selected here. No cameras. No Options. No other props, etc. because they will also be imported into Blender and that’s not what we want right now.
Note though you CAN save a scene instead of a Scene Subset though. Nothing bad will happen if you do that, but just know though that those extra components will be brought-in to Blender and not only will they clutter up your Scene Inventory but will slow things down too.
Export the figure to Blender
Now we’re going to Export To Blender.
If you installed the Diffiemorphic Blender Add-On correctly, you would have created a new menu item in DAZ Studio under the File menu.
Going through the “Export To Blender” step creates a special companion file for Blender that tells Blender where all the bits and bobs that go into your scene (subset) are located and provides additional metadata that doesn’t normally exist in a scene file so Blender can correctly process your scene.
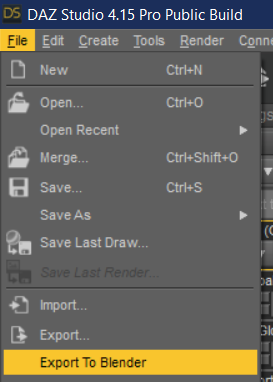
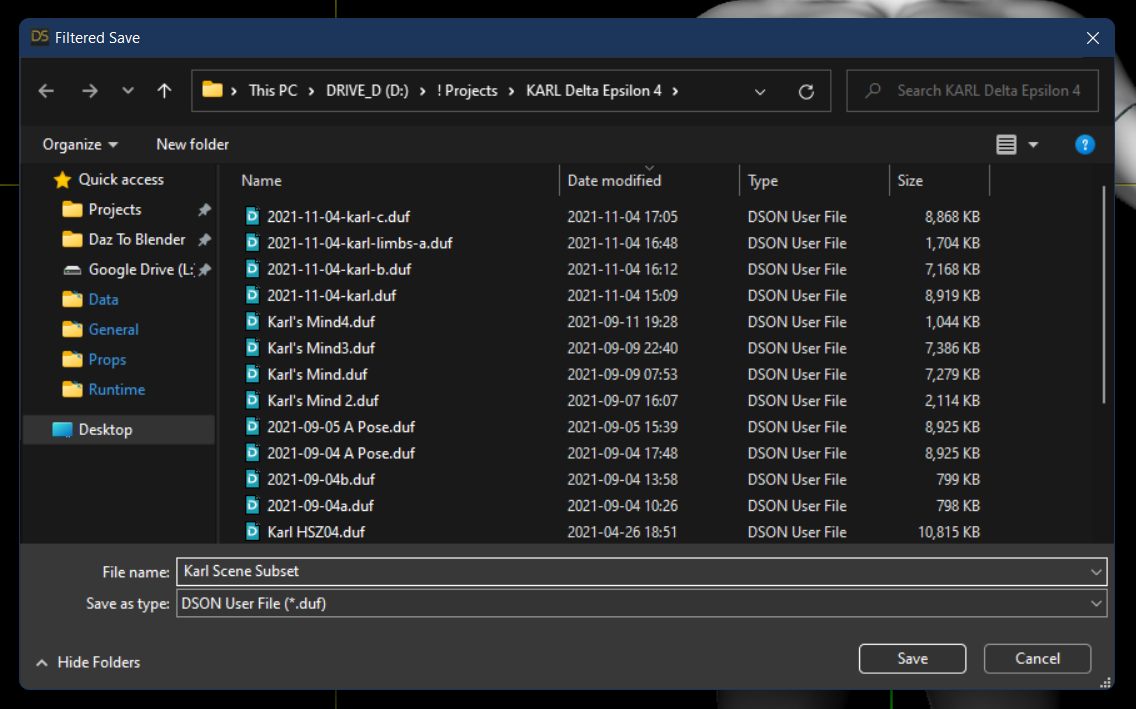
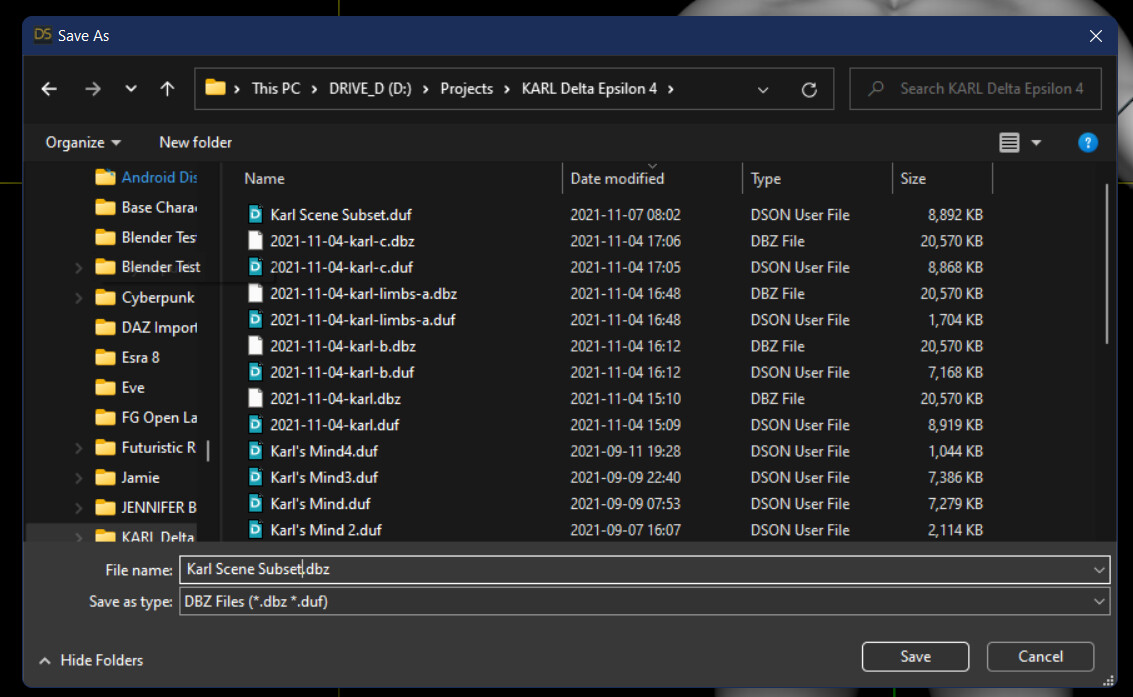
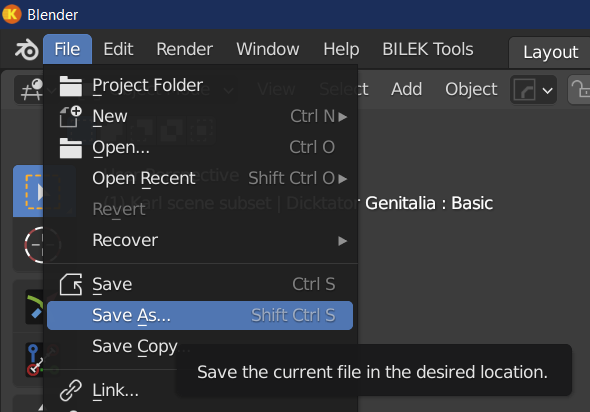
When you click this link, a File Save window will open.
You must give this file the same FILENAME (but not extension) that you chose to save your scene subset out as. The EXTENSION should be
.DBZ.
Now we're going to import the scene into Blender.
By the way I recommend you always run the latest development version of the Diffiemorphic DAZ to Blender Add-On as problems are usually fixed there quite rapidly before a new version is published.
I’m running the latest development version as of this morning and that’s what this tutorial will cover.
If you insist on not running the latest development version and running [1.6.0] for example, do NOT accidentally merge geografts and/ or eyelashes! You’ll need to do this separately as there is a known bug with 1.6.0 when merging geografts and eyelashes that will mess up your workflow and/or figure.
Now that we have a scene subset saved, and an accompanying .DBZ file, we need to import our scene (figure) into Blender.
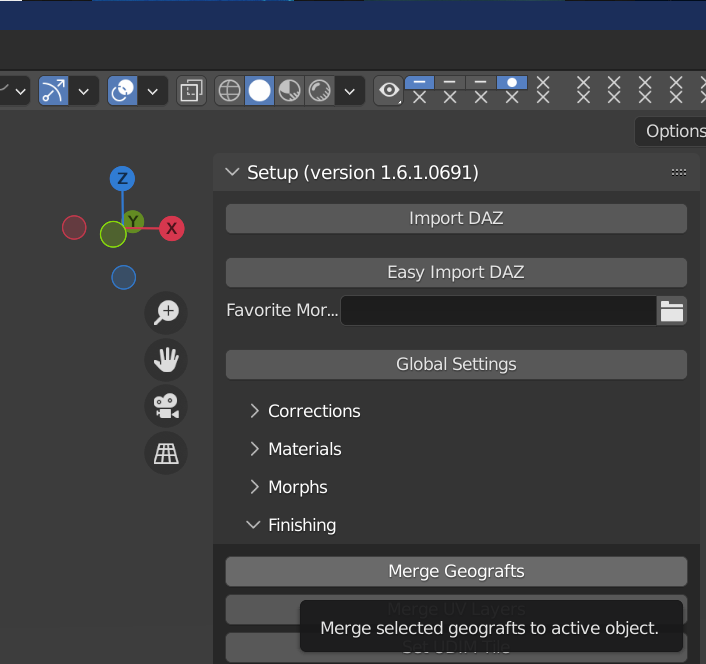
So if you haven’t already done so, press the [N] key on your keyboard to open up the add-on side menu in the 3D Viewport, and select the DAZ Importer tab.
It should look like this:

Go ahead and click on the Easy Import DAZ button:

A Blender File Open dialog will appear:
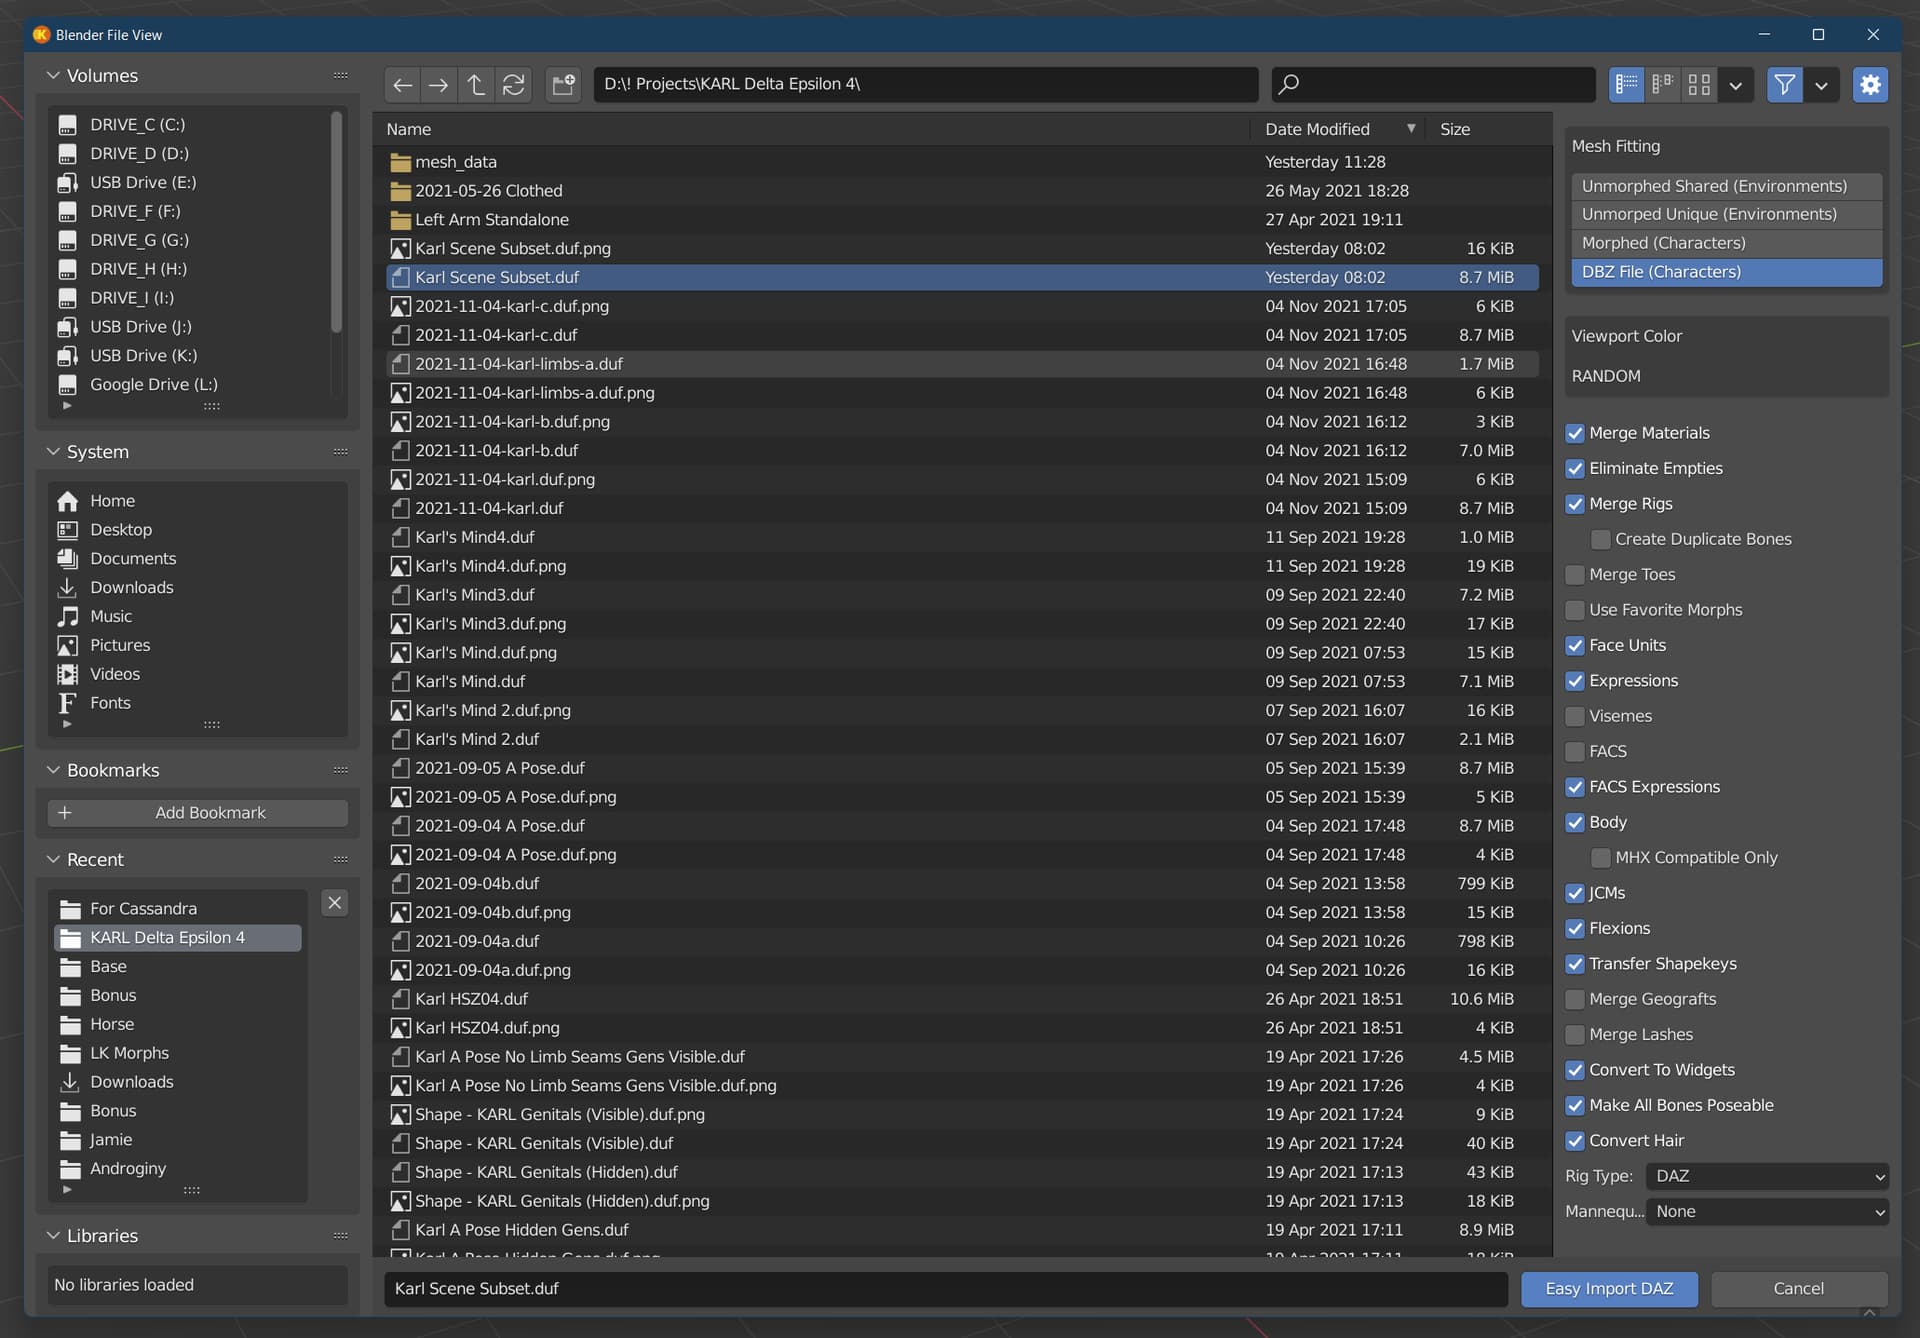
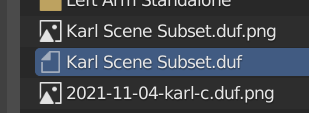
Select the Scene Subset that you just saved out earlier:
And make sure only the following options are checked:

If you would like more information about the various options, check out the documentation here: Diffeomorphic: Import Into Blender
When you’re ready, click the blue Easy Import DAZ button to begin!

Your screen will go blank, and several minutes later you should see your figure in your 3D Viewport Window!
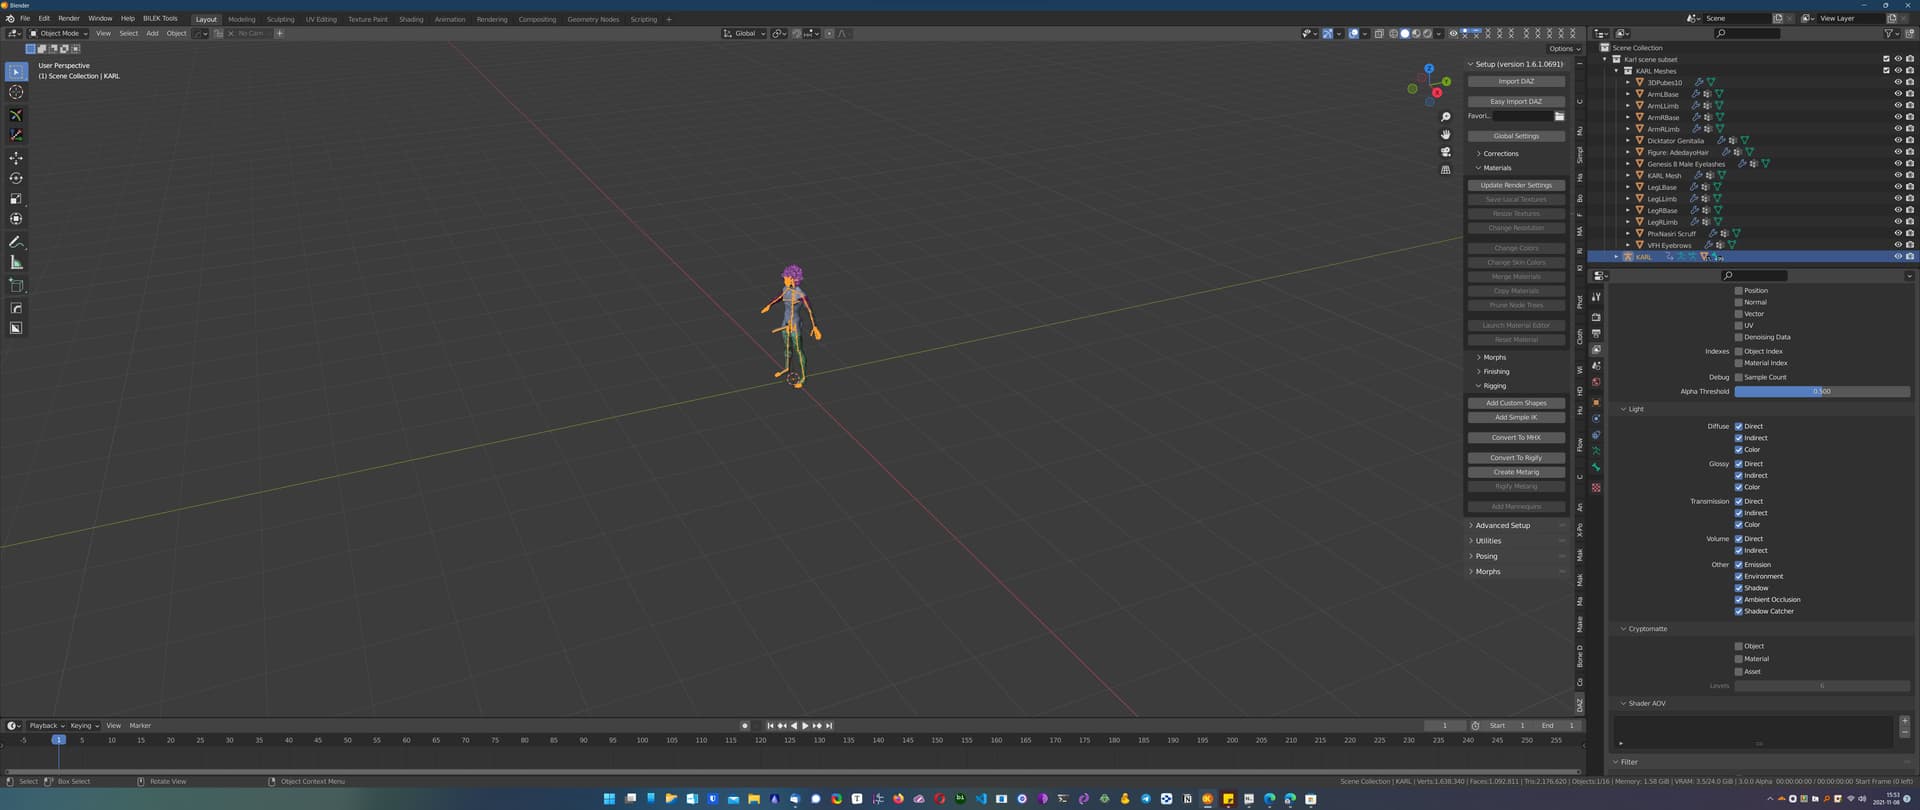
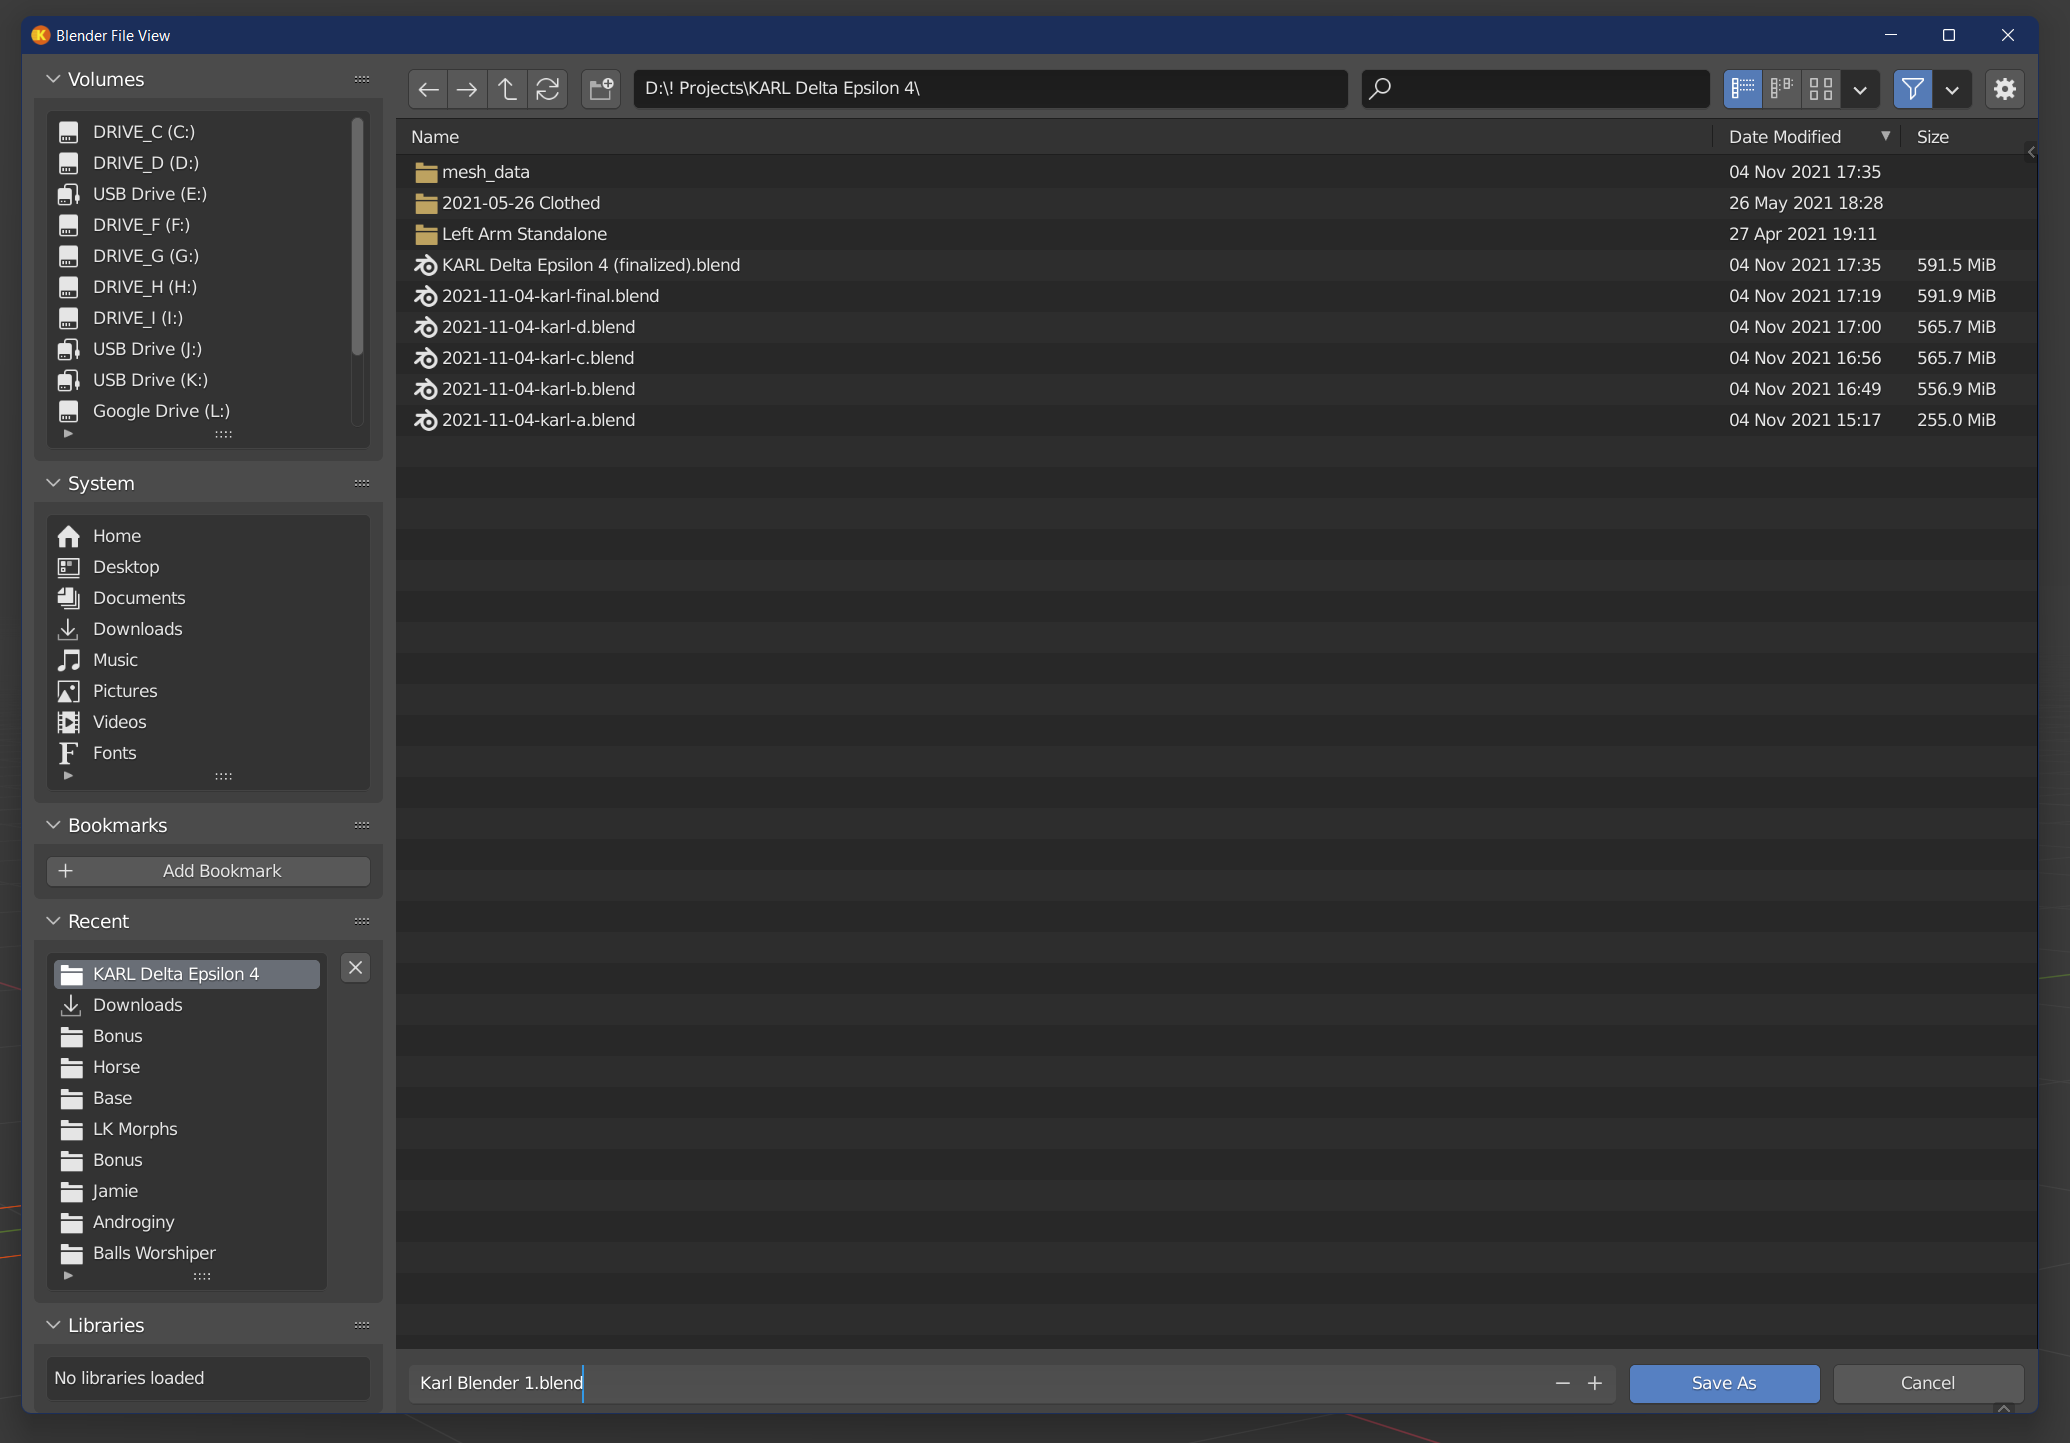
My recommendation is to go ahead and save your Blender scene right now before moving any forward. That way, if you screw something up accidentally you can very easily revert back to a pristine version.
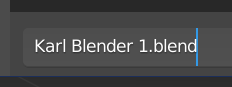
I’m going to call mine
Karl Blender 1.blend.

A word about `.blend` files...
Blender has an option to pack everything you need in a scene nice and neatly and store everything inside the .blend file that gets created.
If you’ve got this option enabled (and I highly encourage you to do so since it makes coming back to work with a scene later very easy… then you must not share this file with anybody else if it contains DAZ studio imported assets.
If you do so you will be in violation of your license agreement with the PAs and the stores you’ve bought your products from as you will also be distributing 100% reproducible copies of any props, figures, textures, hair, clothes, etc.
So keep this in mind! .Blend files are awesome this way but you need to remember the license you agreed to when you bought the products.
Now, if you want to distribute something you 100% made yourself, then feel free. There’s no issue whatsoever with that.
I’m saying this now because I don’t support or condone software piracy. Artists have a right to be compensated for their work. One of the reasons I absolutely hate game rips, etc. as well!
Rigging: DAZ vs. Rigify vs. MHX
If you noticed earlier when we were importing our DAZ figure into Blender we had an option at the very bottom of the Easy DAZ Import window to assign rigging to our figures in our scene.
The default is DAZ. And that pretty much mimics the same rigging that you’re used to.
I don’t particularly care for the DAZ rigging and find it quite cumbersome to use within Blender.
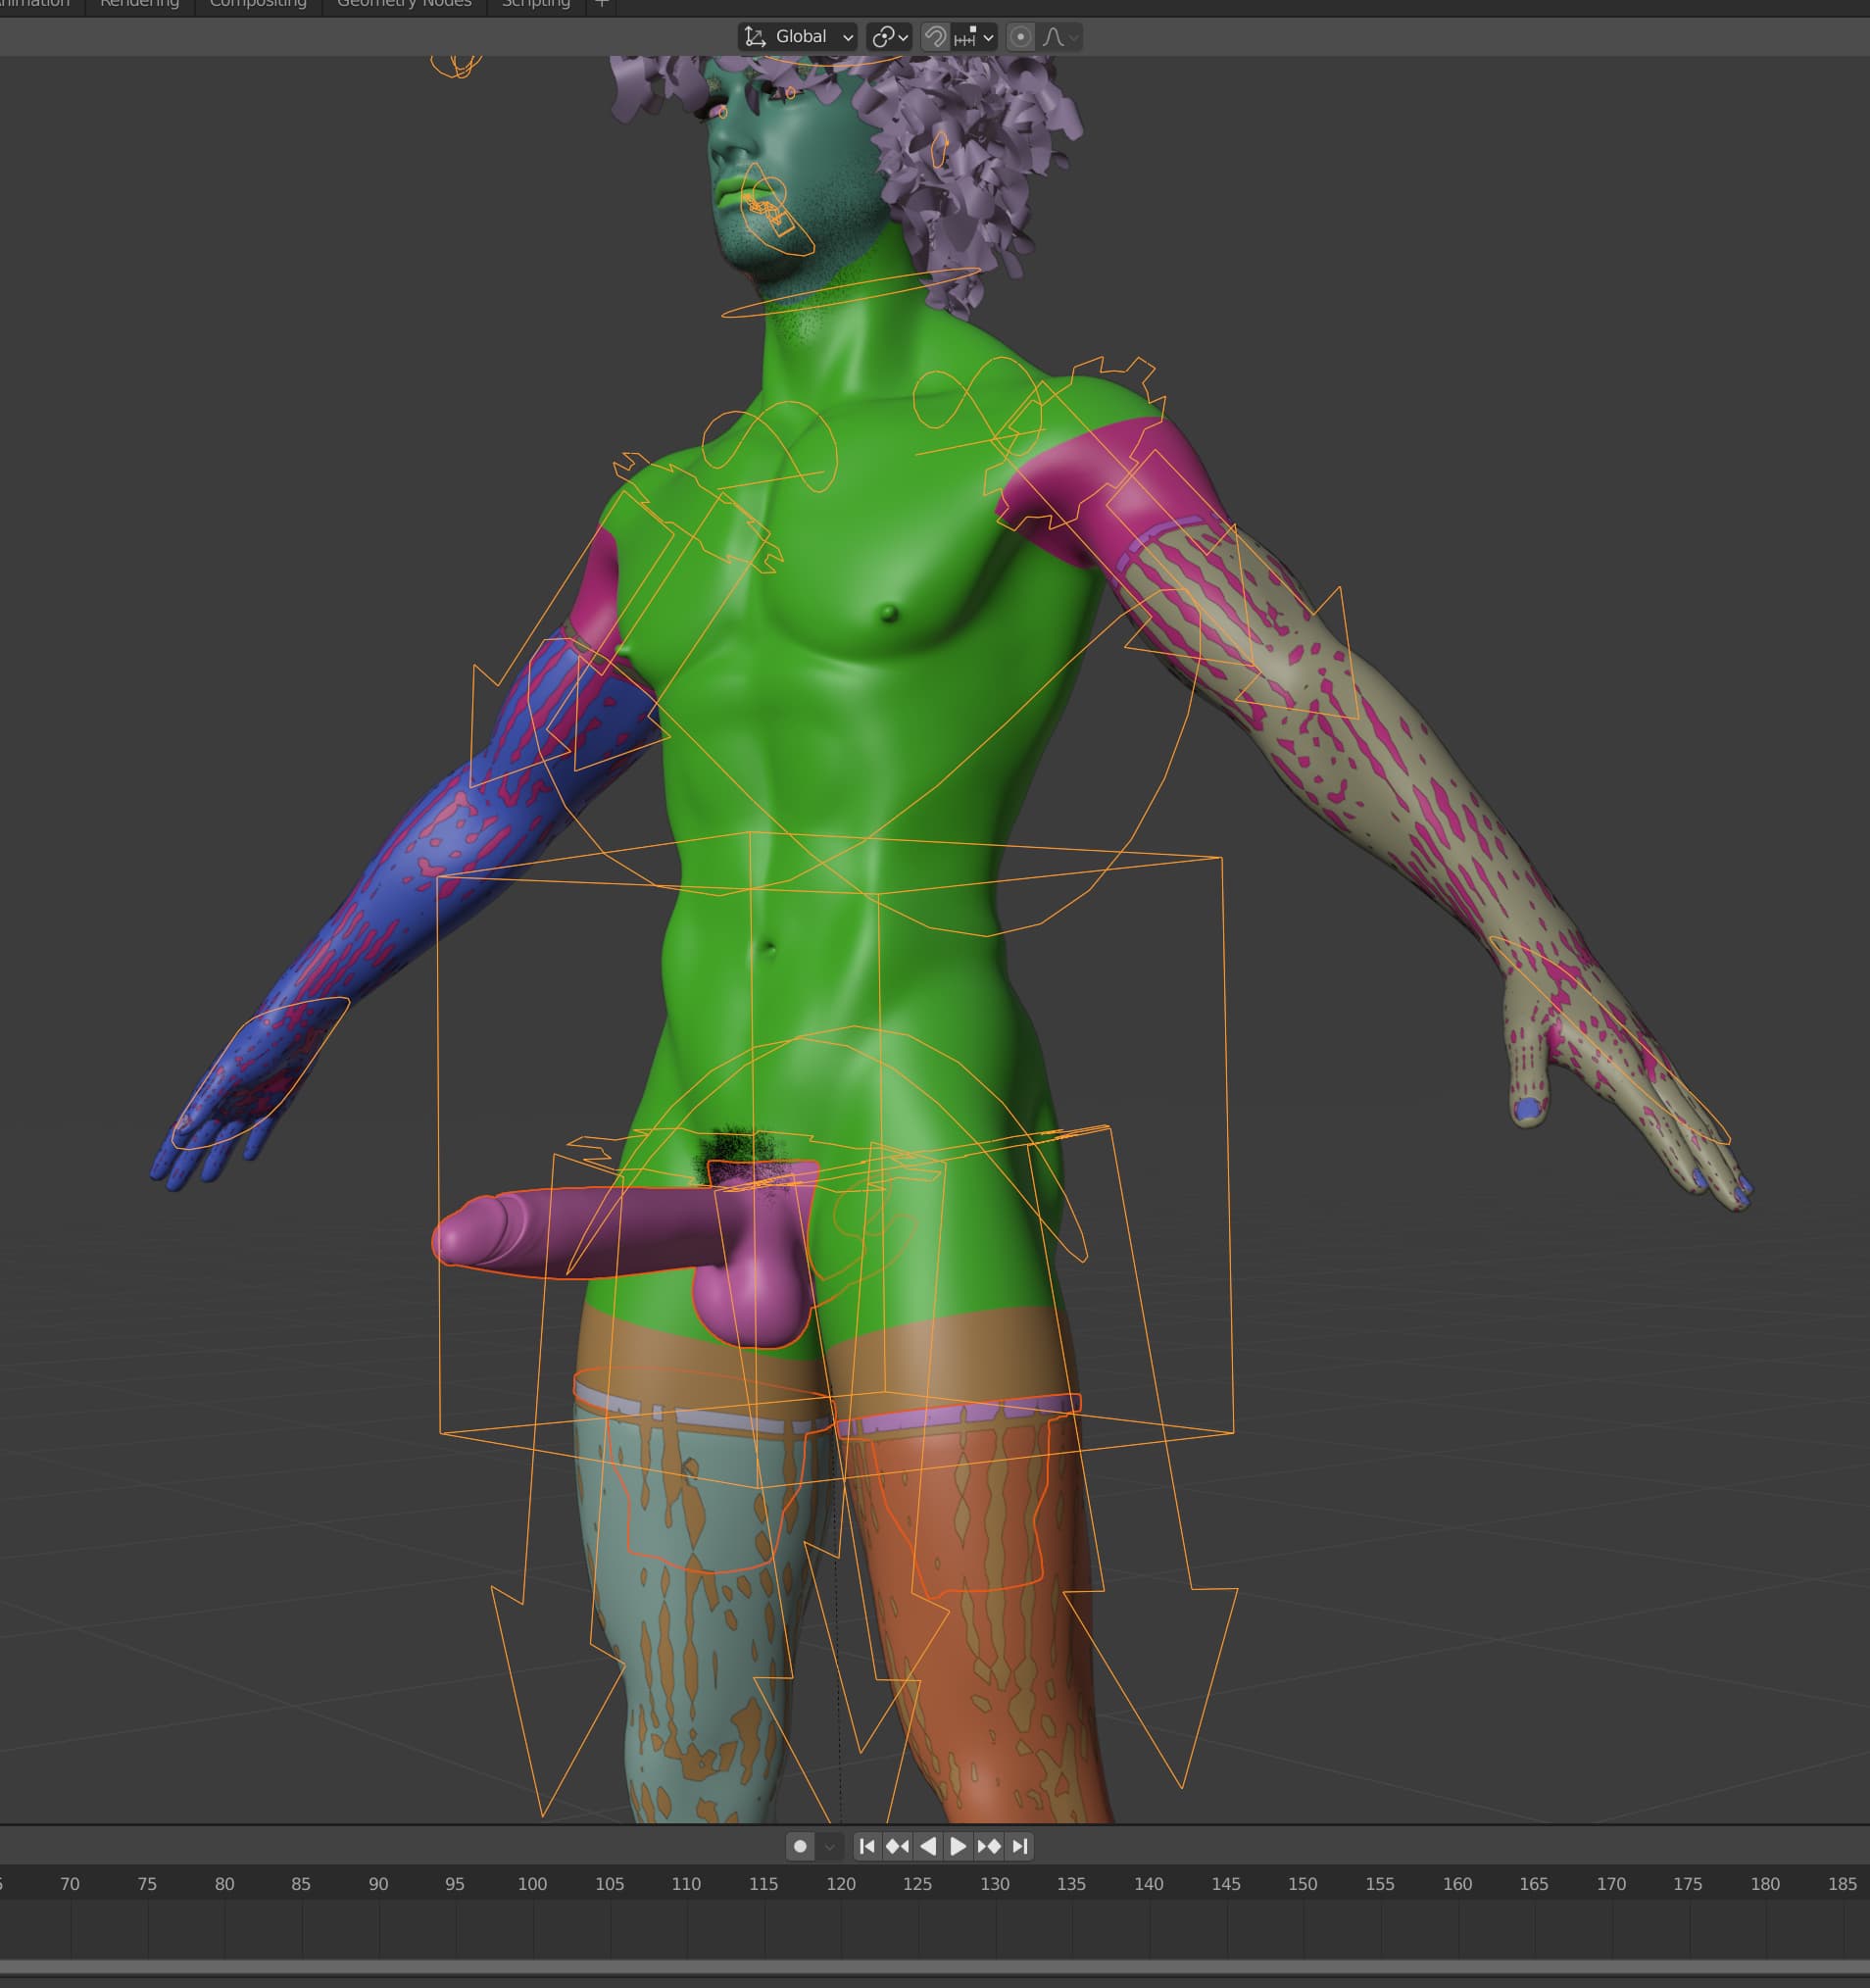
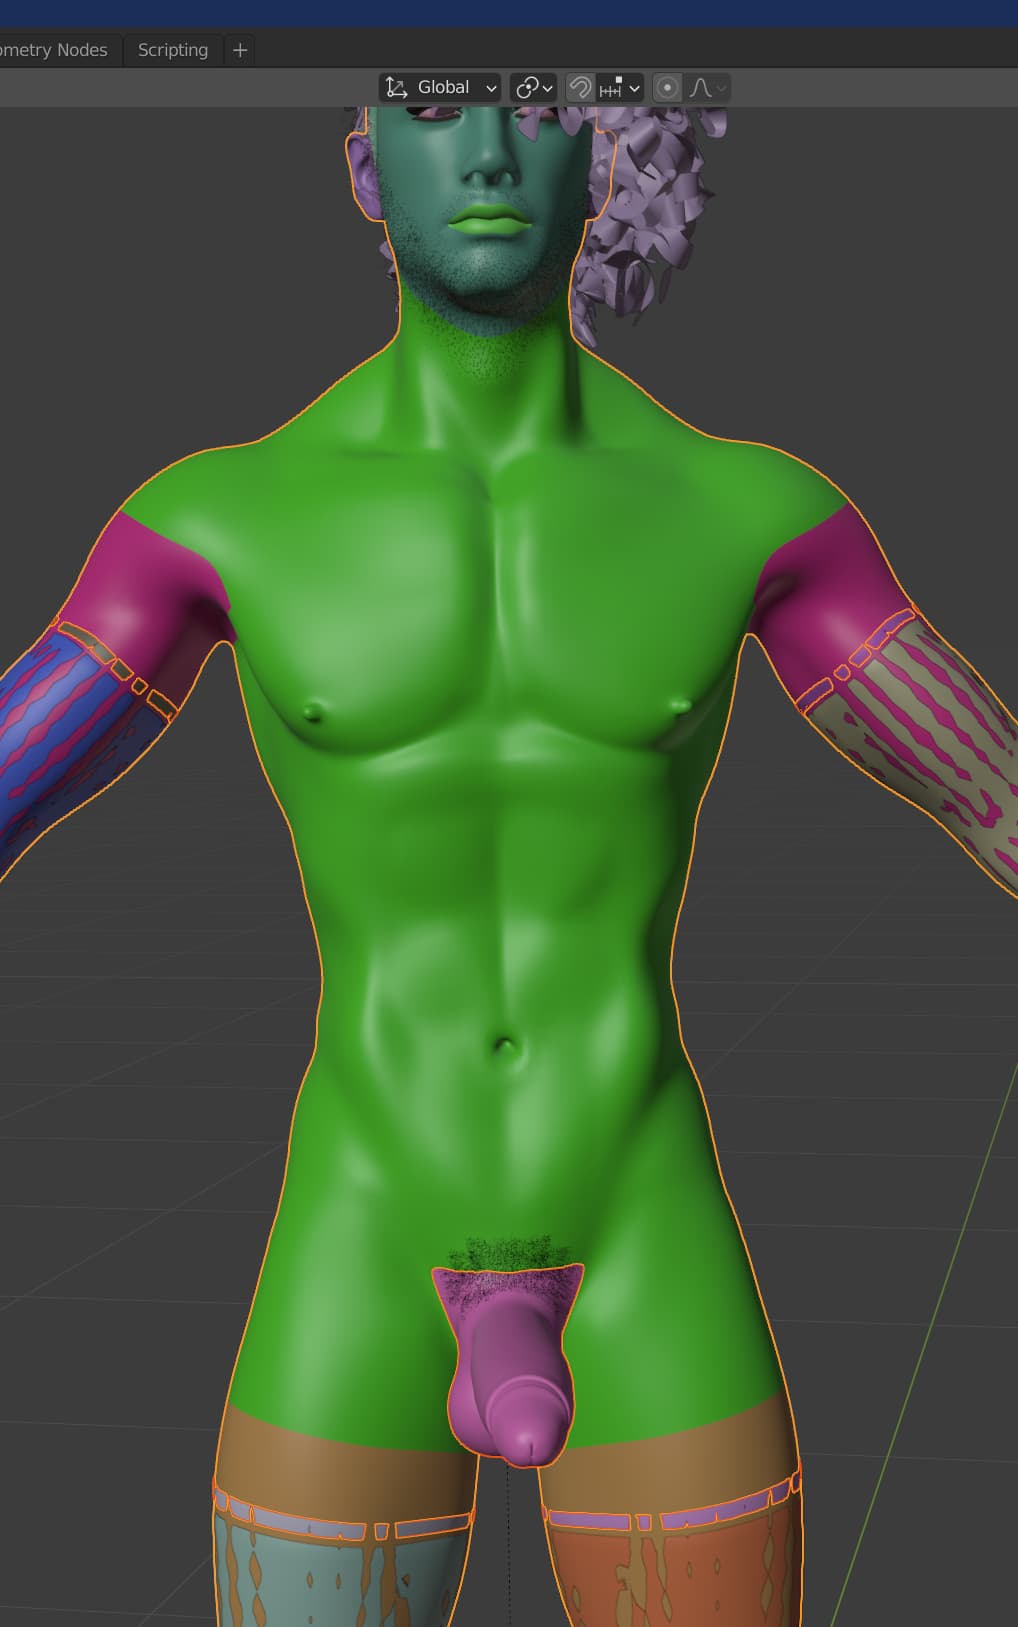
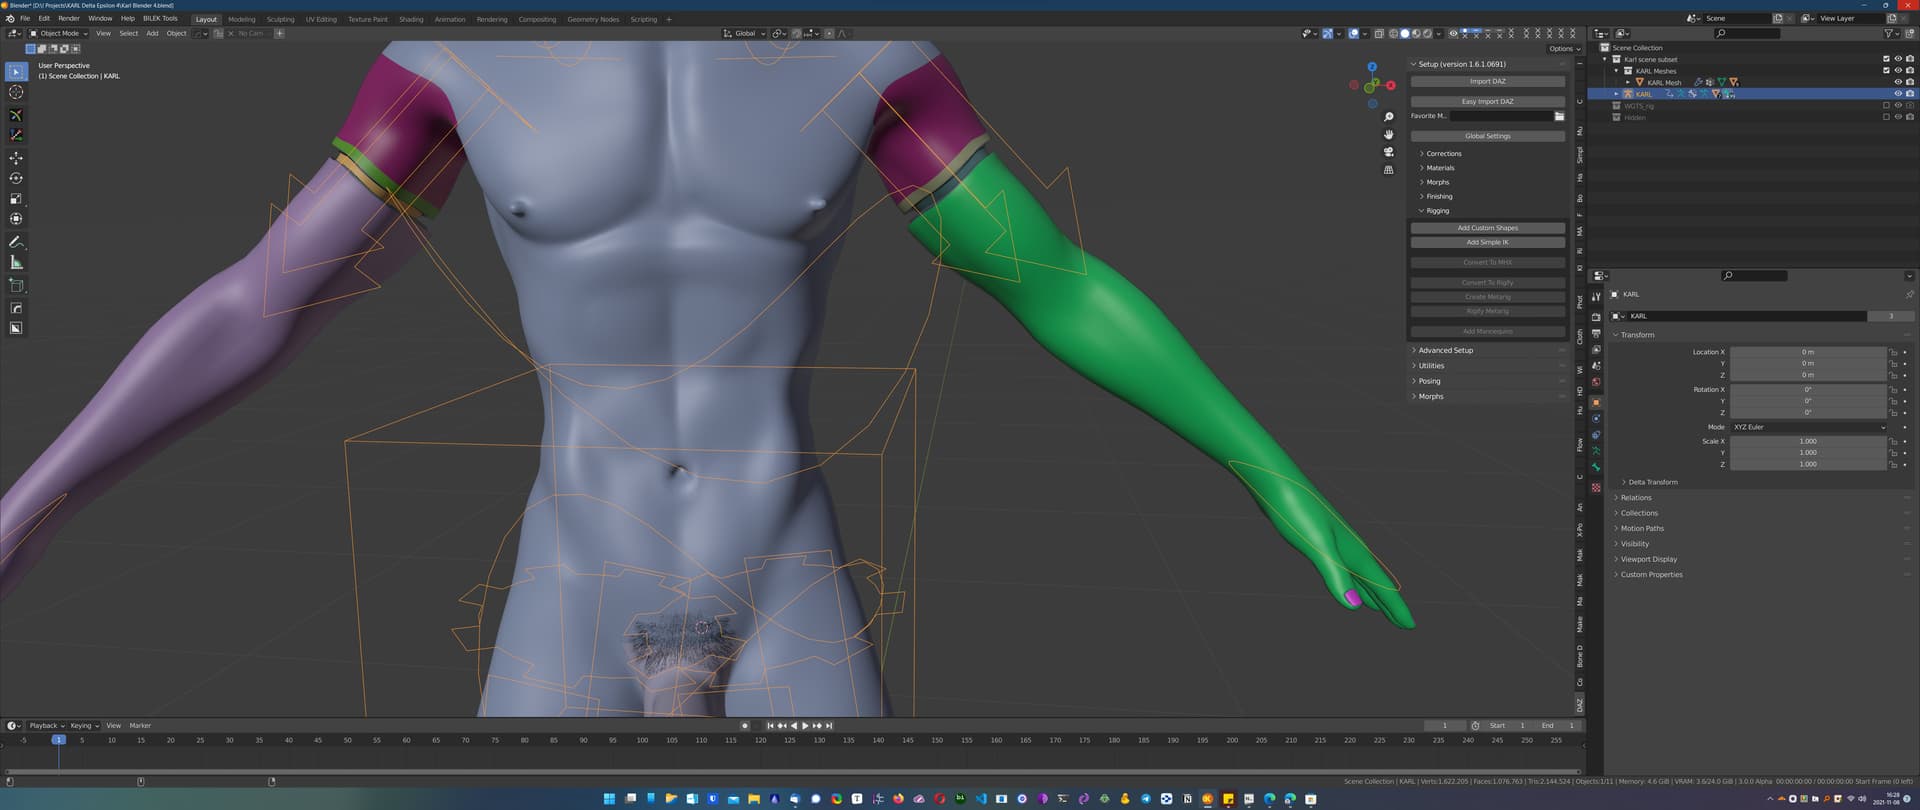
Rigify is the standard Blender rigging. If you look at the screenshot above you’ll see many more guides surrounding my figure than what you’re used to seeing in DAZ.
To be perfectly honest, using the Rigify rigging I don’t need any custom pose packs to pose my figure. Pulling and dragging my figures’ limbs through the 3D viewport space is so natural
One of the main reasons I love Blender so much. Doing things are just so natural in Blender whereas in DAZ Studio they require you to either buy someone’s pose packs or buy another addon to compensate for Studios shortcomings.
The last rig called MHX is the Metahuman Compatible rig format. If you plan to create additional figures in your scene with Metahuman and want to animate them this will help speed up your workflow.
For my purposes, I mainly choose Rigify. Other artists prefer MHX. But I rarely see anyone using DAZ. So keep that in mind. ![]()
We will be converting the DAZ Rig to Rigify at a later step. For right now, make sure you import the DAZ figure in with the DAZ Rig!!!
Load Custom Morphs
Now your figure is in Blender, and it’s got some morphs. But any morphs for your geografts have NOT carried over so you’ll need to load those manually.
This is why it’s so important not to merge your geografts on the initial load, or merge your eyelashes. Because doing so will change the vertex order of your mesh and then any custom morphs won’t work.
It’s a good idea to figure out where the morphs are for your geografts at this time. They might be in the ReadMe (a file list) or you’ll just need to browse through your hard-drive. But find this information about now before proceeding any further.
For Dicktator, the morphs are in \Data\Meipex\Dicktator_Genitalia_G8M\Dicktator_Genitalia_G8M_v3\Morphs.
And for the Pixelsploiting Plugin Limbs it looks like they don’t have any.
So now that you know where the custom morphs are for your geograft, select the geograft in the Outliner:
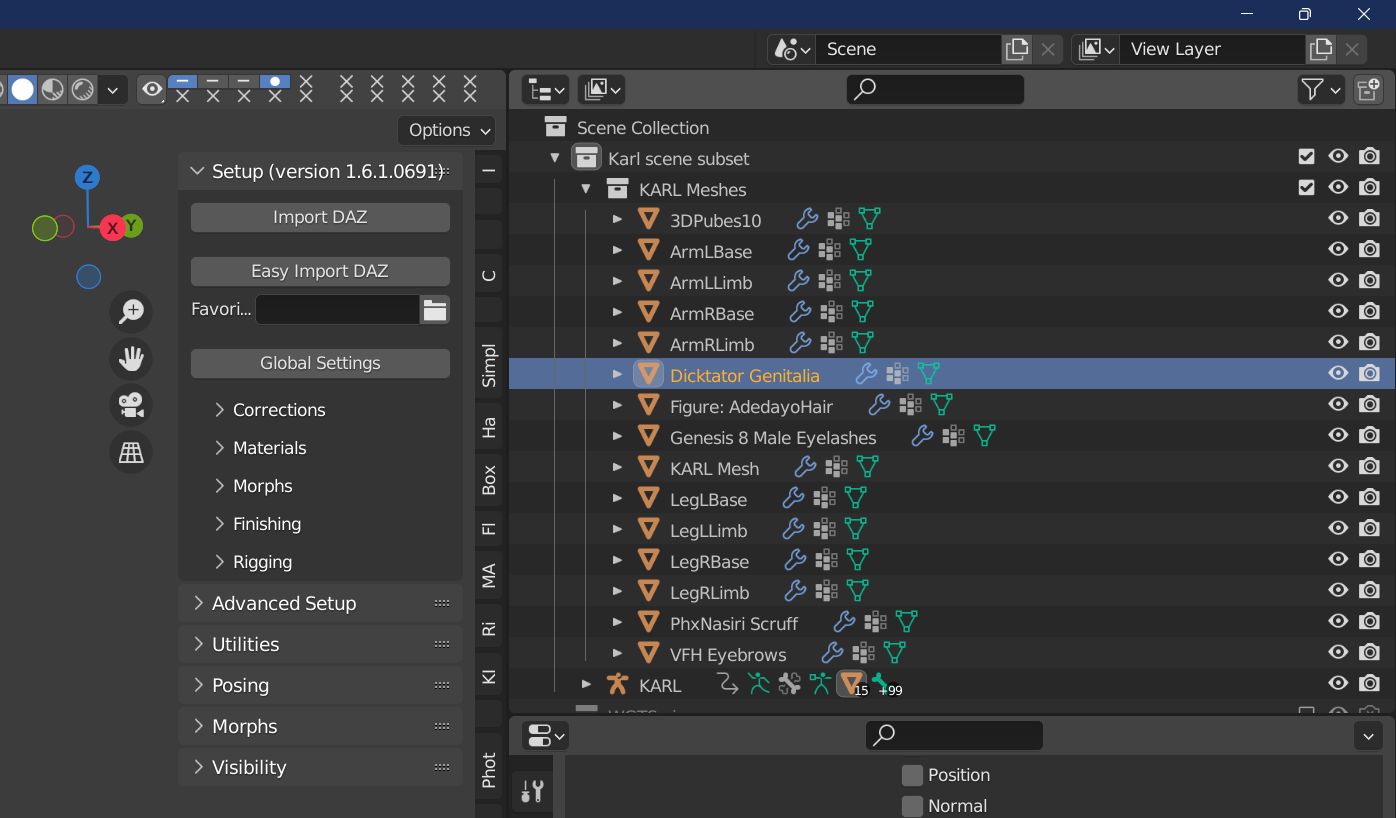
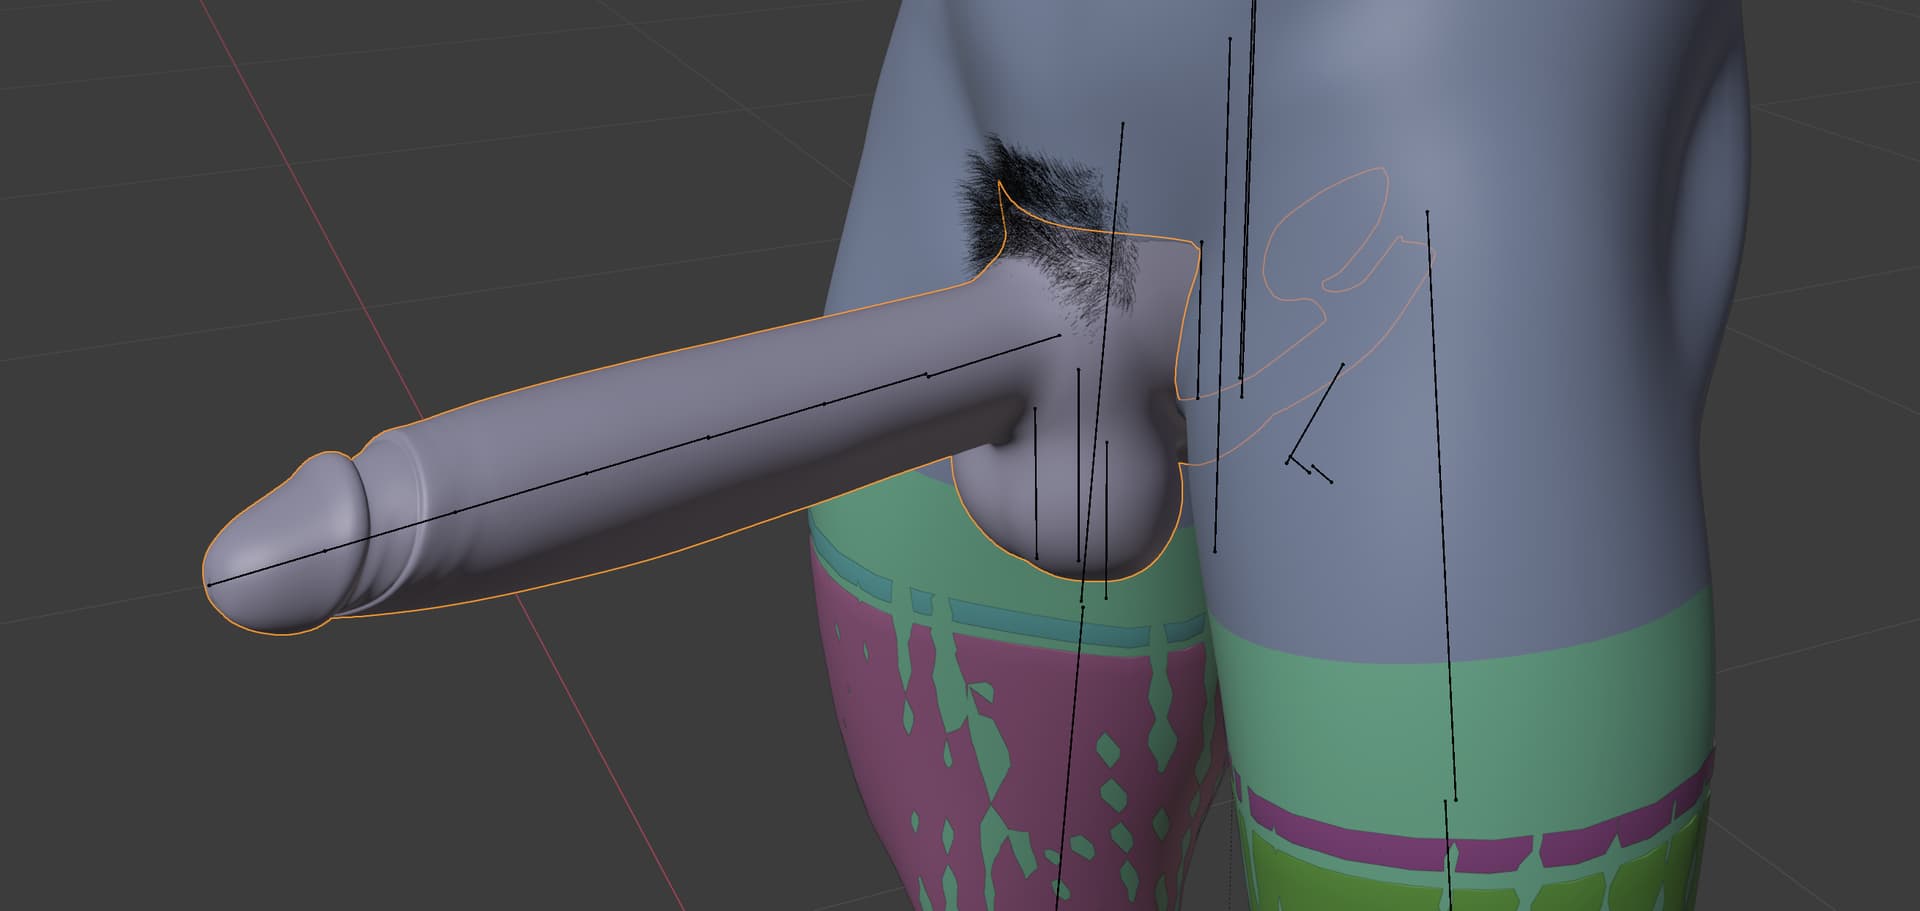
And you should see a highlight around the Dicktator genitals on your figure:
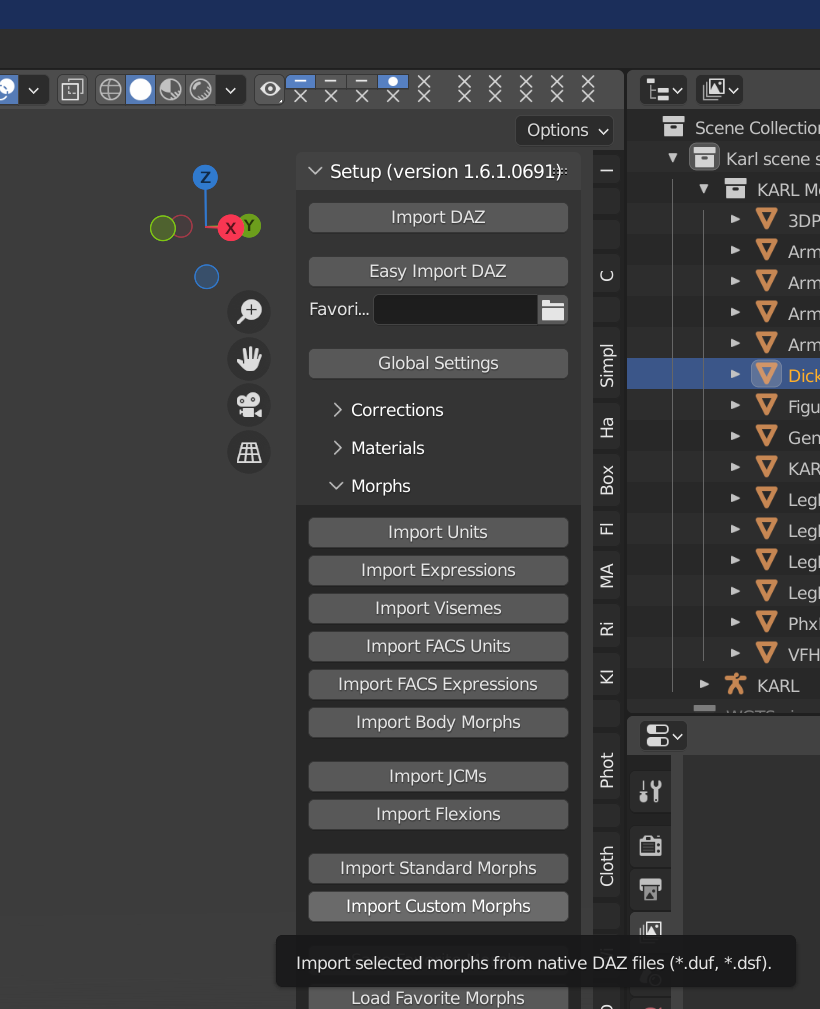
Go back to the DAZ Importer add-on and expand the “> Morphs” section. You will now see several new options.
Click the button marked “Import Custom Morphs”:
A file-open dialog box will appear:
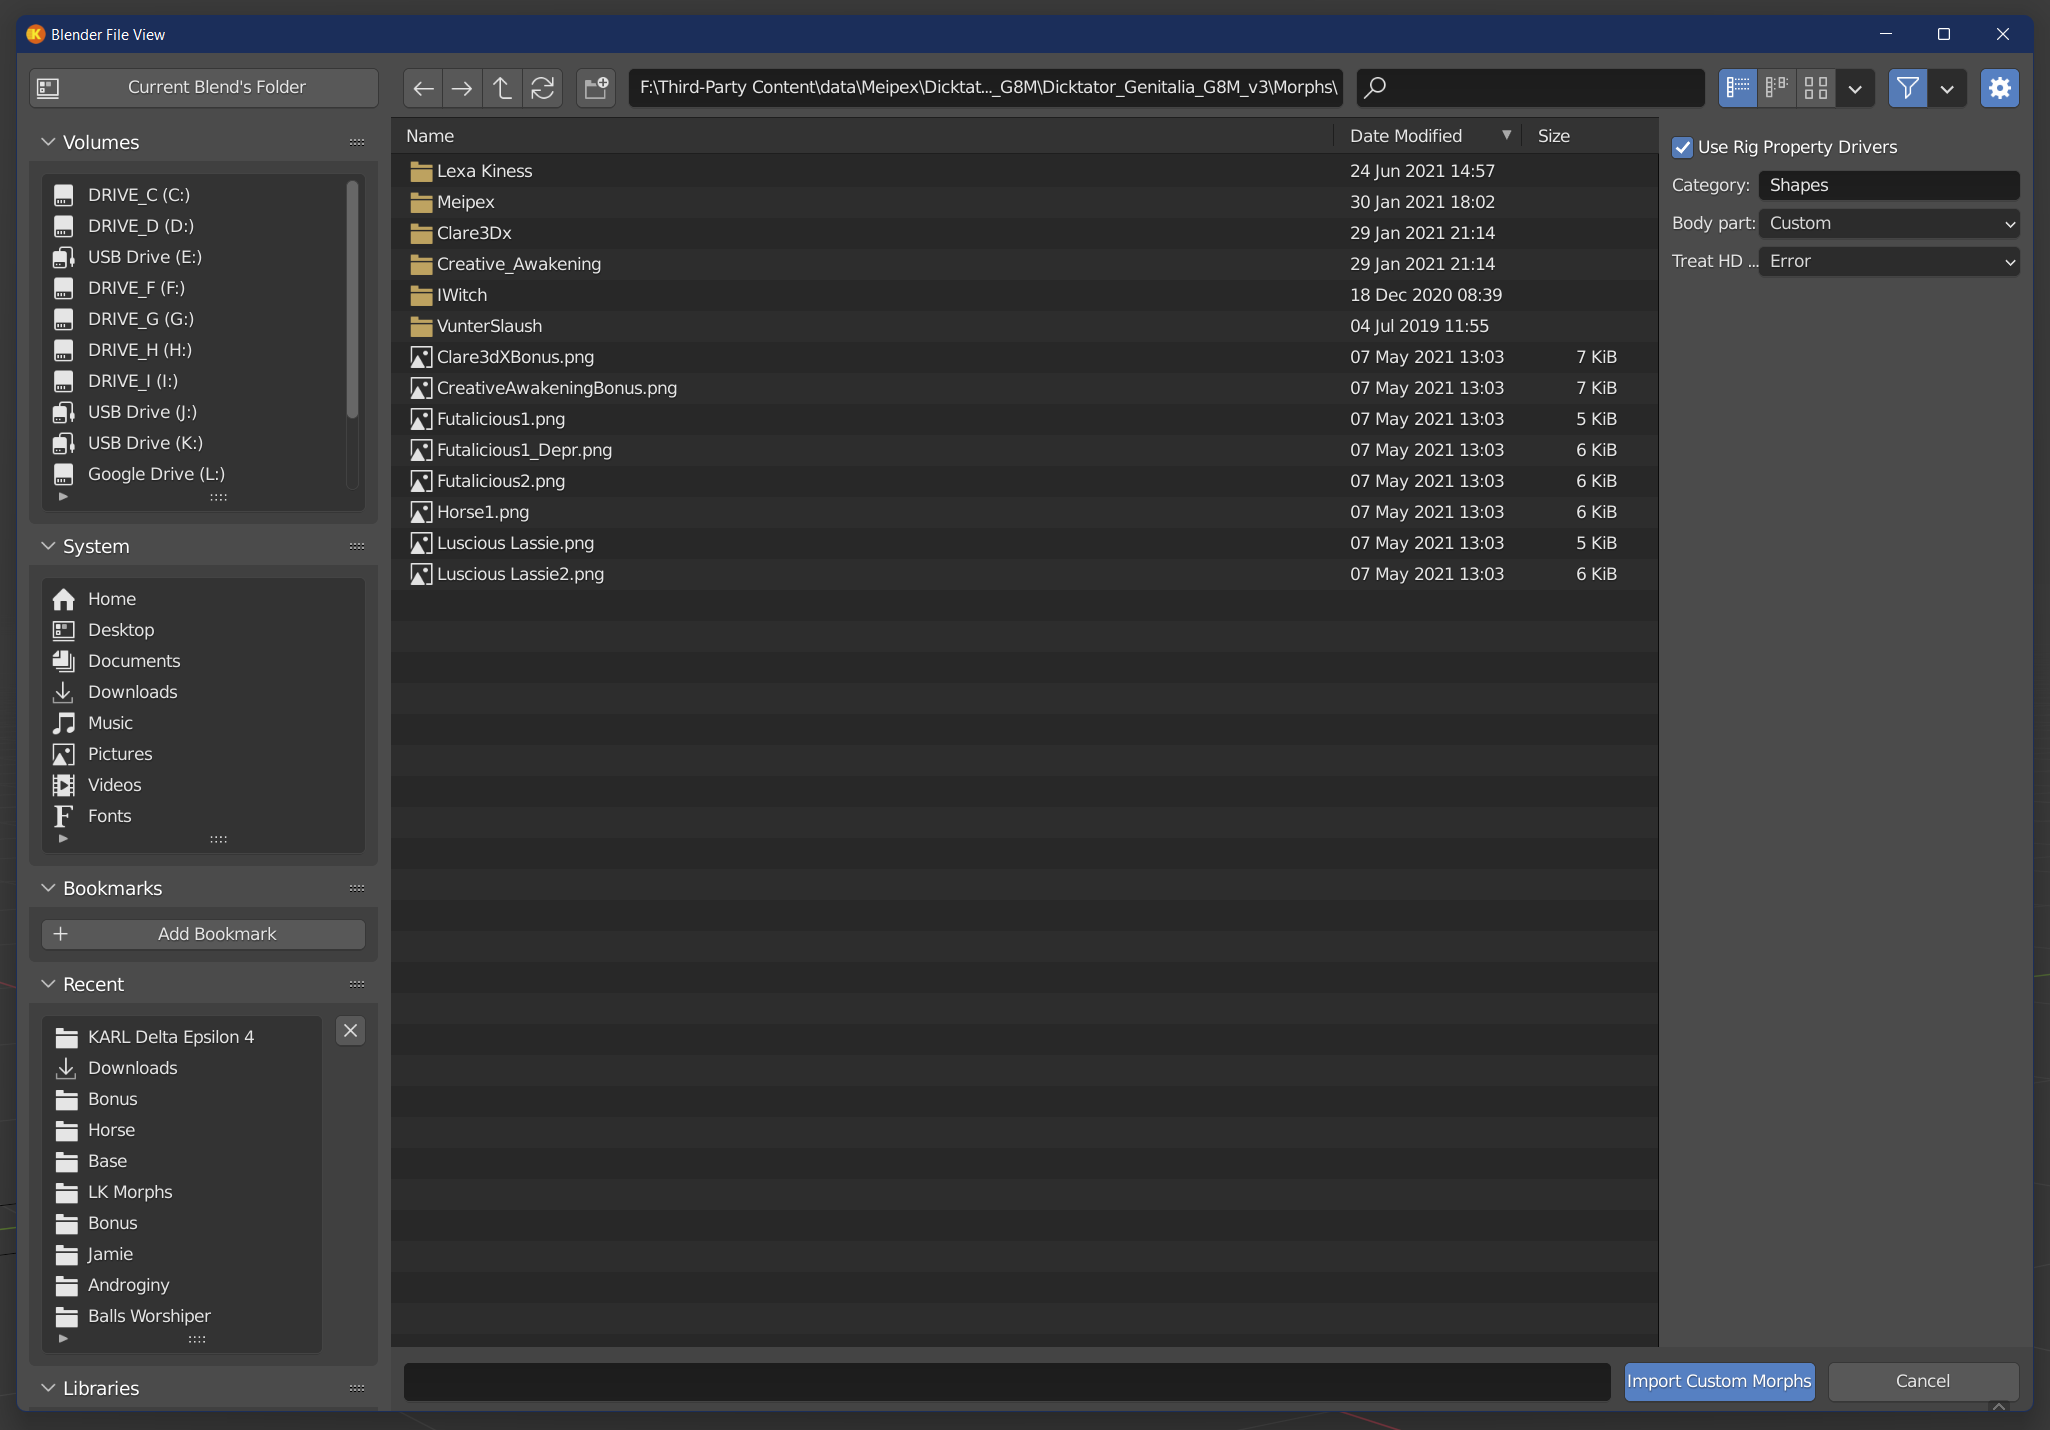
Navigate to where the Dicktator morphs are located on your system. On mine, I have a separate Content Library for everything non-DAZ related, so mine aren’t in the main Content Library.
YMMV.
A note about the Dicktator morphs. As you can see by my screenshot there are several folders here. That’s because in addition to Meipe’s own morphs for his products, I also have some add-on morphs from other PAs.
Dictator is also a very useful add-on and can be used for a variety of different animals as well as humans.
You do NOT have to install every morph here. Just like with DAZ the morphs a figure has the longer it will take for that figure to load.
But you can’t go in an add morphs back in later either. Usually. There are a couple of rare, very specific circumstances where you might be able to but for 99% of the time you won’t be able to.
So select only what you think you’ll need, don’t select the kitchen-sink, but also make sure you’ve got enough so you can work with your figure successfully.
Once you’ve loaded all the custom morphs you want to load, you can expand the “> Morphs” section, “> Custom Morphs” sub-section, and “> Shapes” group to see all the morphs you’ve loaded-in for Dicktator:
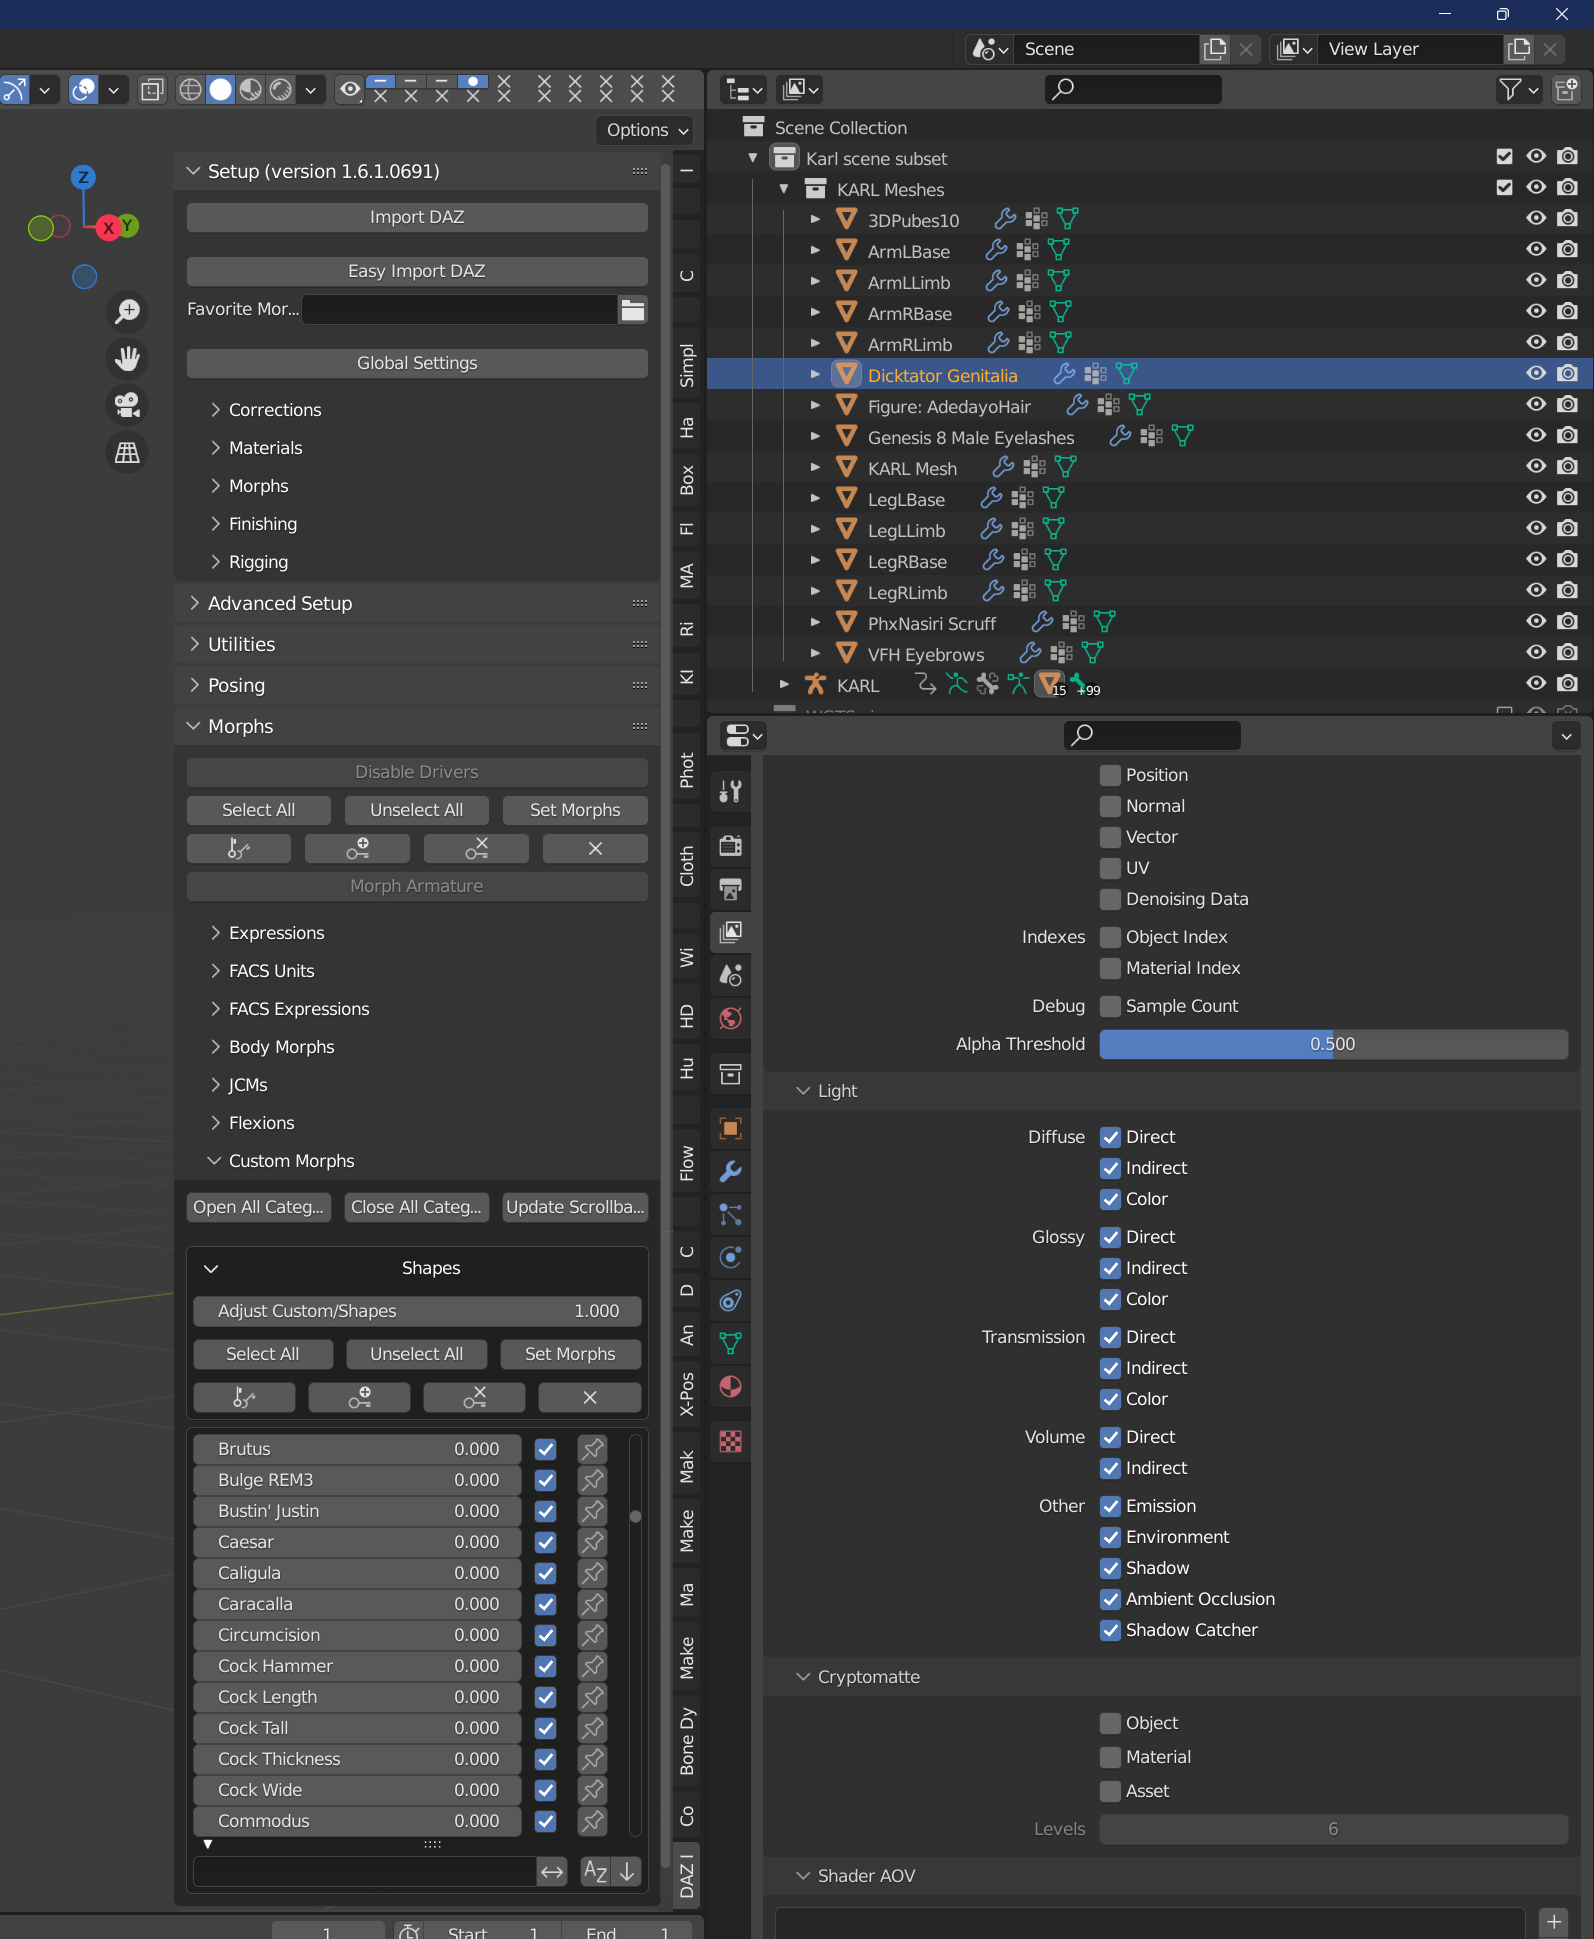
Don’t worry if there is an overwhelming list of morphs. There’s a search bar that will rapidly take you to the shape key you want as soon as you start typing.
If you noticed, I also expanded the window to make the morphs a little bit more easier to read!
But before we do anything further, let’s save what we’ve got in case we screw up and need to go back!
I’m going to call mine Karl Blender 2.blend. Go ahead and save your scene out at this time.
Now let's start merging some of these geografts!
Since when you merge geografts you naturally change the vertex order, it’s important that we merge all of our geografts into our figure at the same time.
This is why at the very start of this tutorial I had you make sure everything that was part of your figure was actually under your figure in DAZ Studio before you exported your figure out.
Doing that makes this part so much more simpler (and easier).
So go ahead and select each of your geografts only. Use the Shift-key to select multiple ones.
Also, select the geografts on the figure itself, not in the outliner!
It might take some practice. Here I accidentally clicked on the rigging and accidentally selected that.
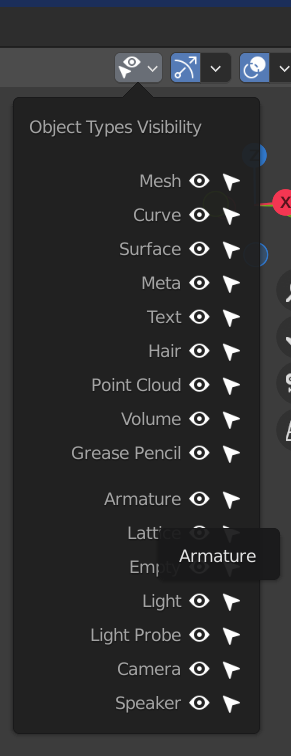
In Blender you can selective turn off certain components of your figure. I’m going to disable the rigging so I don’t accidentally select it going further:
It might take some practice. If you accidentally select the figure itself you’ll just need to click-out and try again:
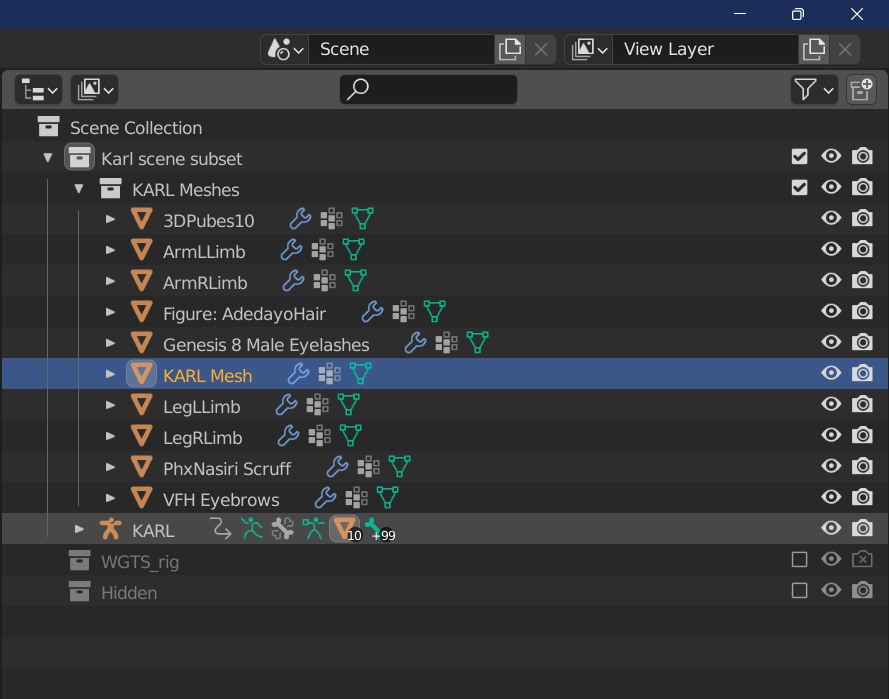
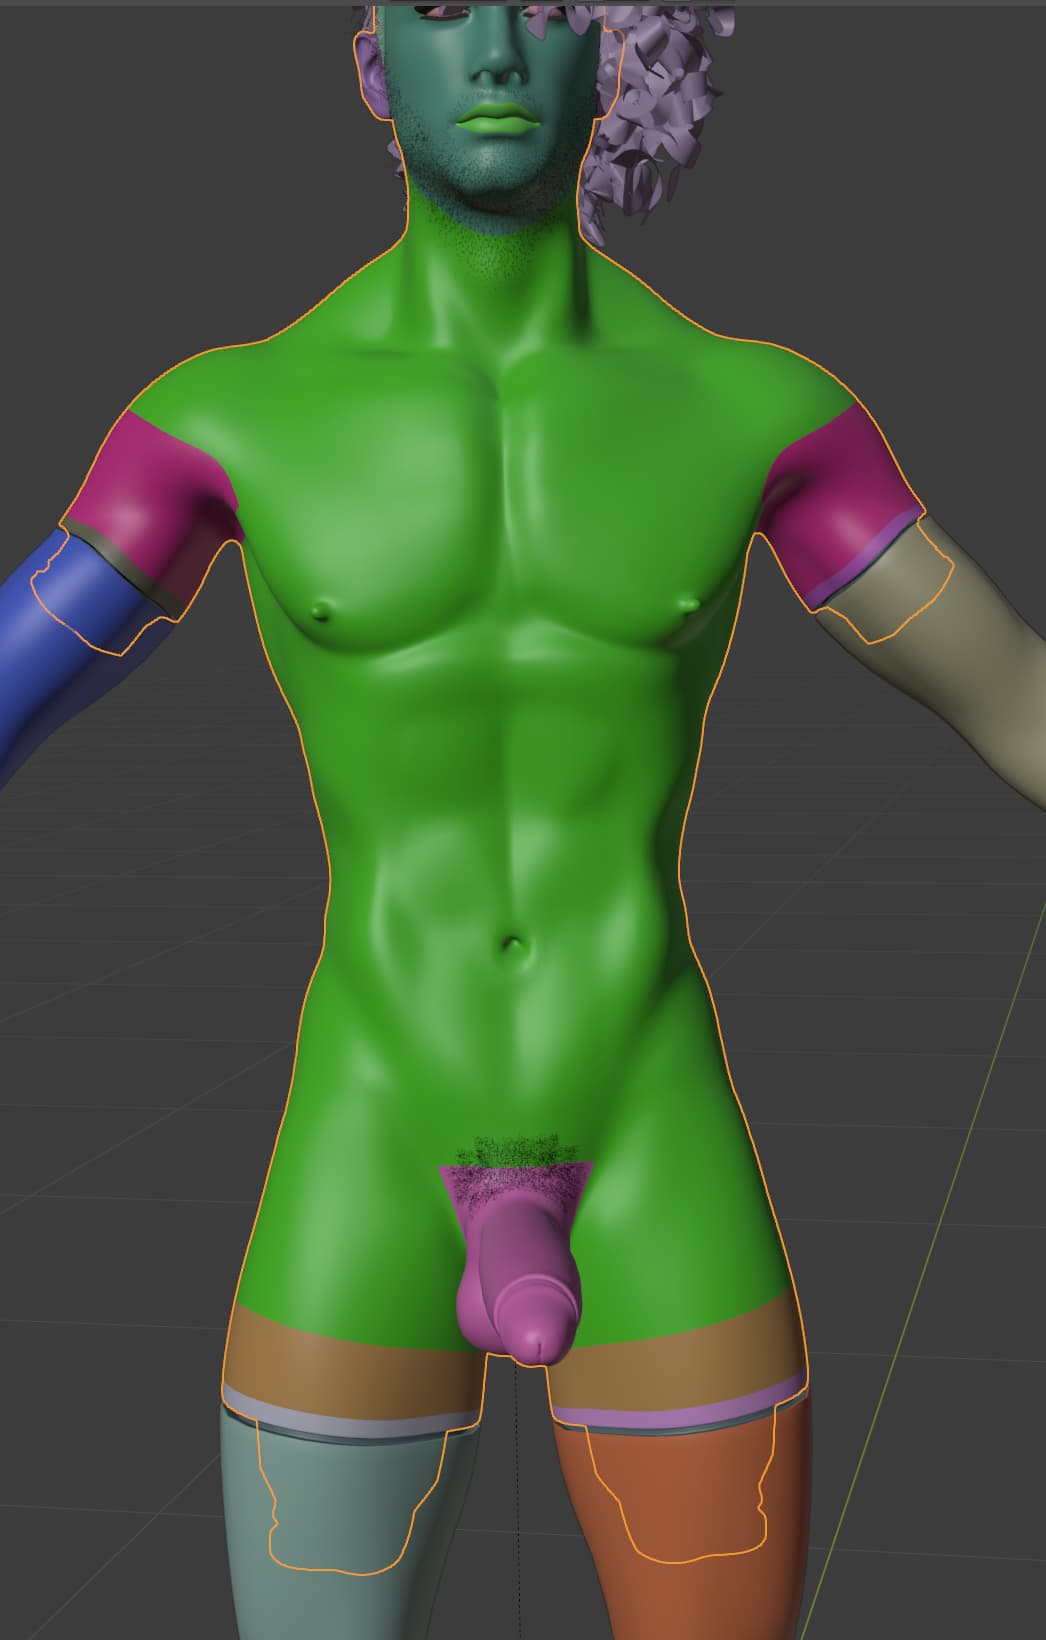
Finally got it! As you can see I have five distinct components selected:
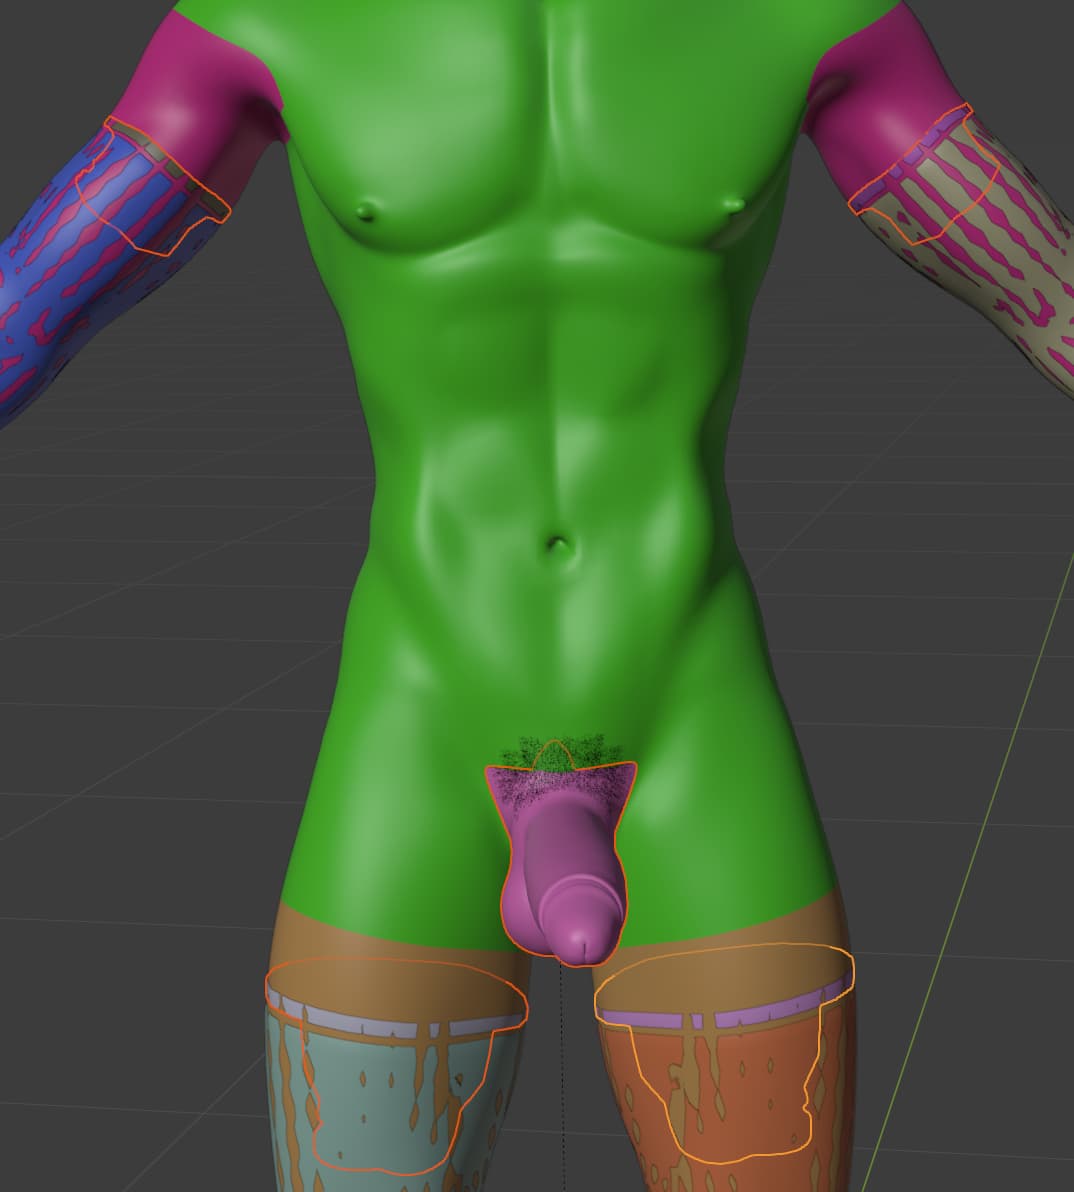
Something embedded in the left arm, something embedded in the right arm, something embedded in the left leg, something embedded in the right leg, and the genitals!
Now, shift-click on the figure’s torso to select the body. The body needs to be the last thing selected in this process.
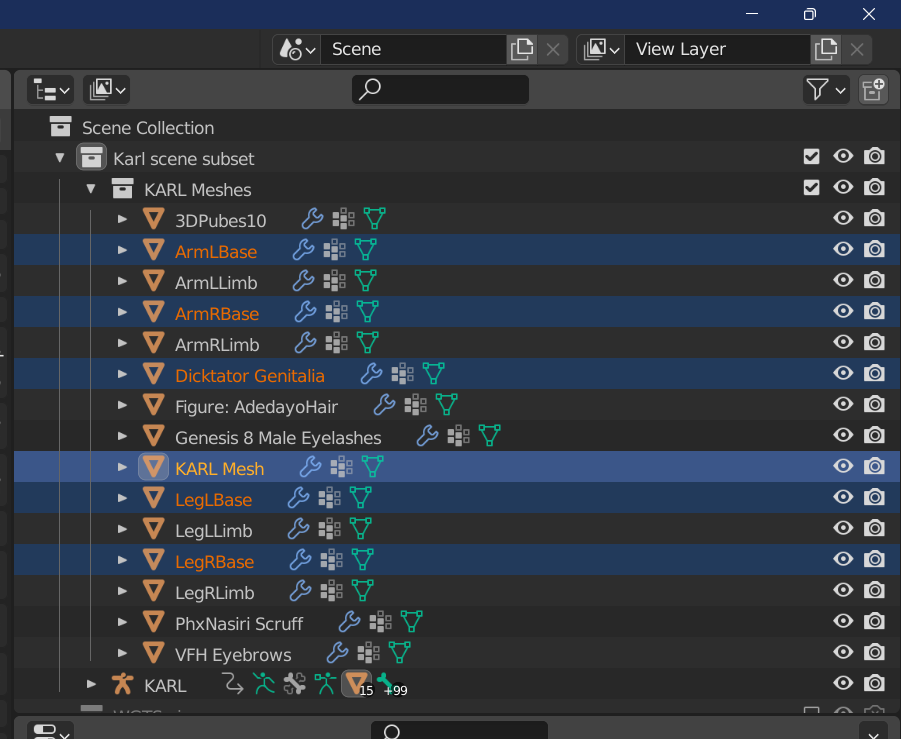
If you look at the Outliner you will see KARL Mesh is more brightly highlighted along with the (5) geografts we just selected:
And if we look at the figure, we can see the same thing:
Expand the “> Finishing” section of the DAZ Importer addon and click the top button that’s marked Merge Geografts:
Keep the two options checked (Merge UV Layers, Add Vertex Table):
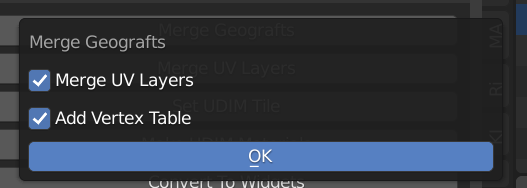
Click OK.
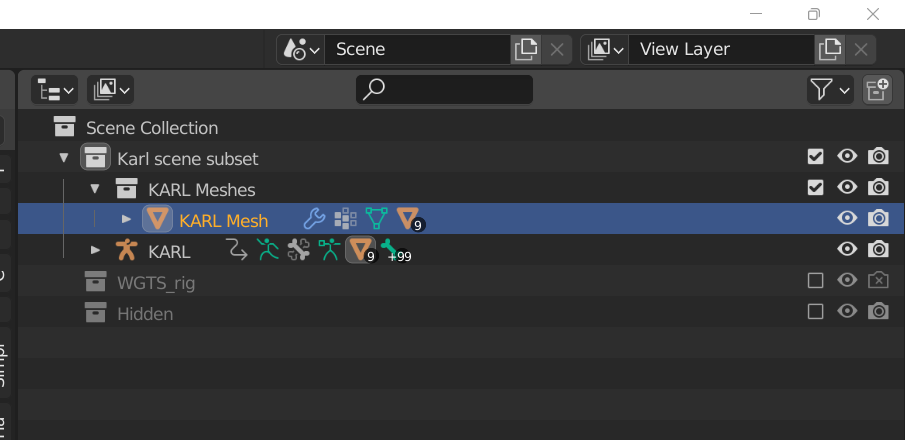
Now when we look at our Outline it looks a little different:
And so does our figure!
Our figure is basically now a quadruple amputee. The arms and legs that you can still see aren’t actually part of his body.
Now would be a good time to save out another version of our .blend file so we can come back if we screw up. I’m going to call mine Karl Blender 3.blend.
Parenting Everything
Diffiemorphic’s instructions call for joining the eyelashes to the figure. Doing that actually combines the meshes. But in my experiments that really hasn’t been necessary.
I prefer parenting the objects instead. This works almost the same as in Studio, except in Blender when you parent an object you have the ability to have the child object follow the parent’s transforms (rotations, scale, etc.)
The good news is if you actually DO want to join a mesh later it’s pretty easy to back-out and “un-parent” an object and then later “join” it. So for my purposes, let’s parent everything together.
Starting with:
- The Hair
- The Eye Brows
- The Eye Lashes
- The Facial Hair
- The Arms (both of them)
- The Pubic Hair
- And the Legs (both of them.
This is pretty simple. Shift+select object one at a time, and then shift+select the body.
Right-click.
Ctrl+P.
Select Object (Keep Transforms).
When you’re done with all that your Outline should look something like this:
Now would be a good time to save out another version of our .blend file so we can come back if we screw up! I’m going to call this one Karl Blender 4.blend.
Let's convert the rig now to Rigify!
Select the armature/ rigging for your figure (click the spine bones that’s the easiest)…
… and go to Pose mode.
Then expand the “> Rigging” section of the DAZ Importer Script:
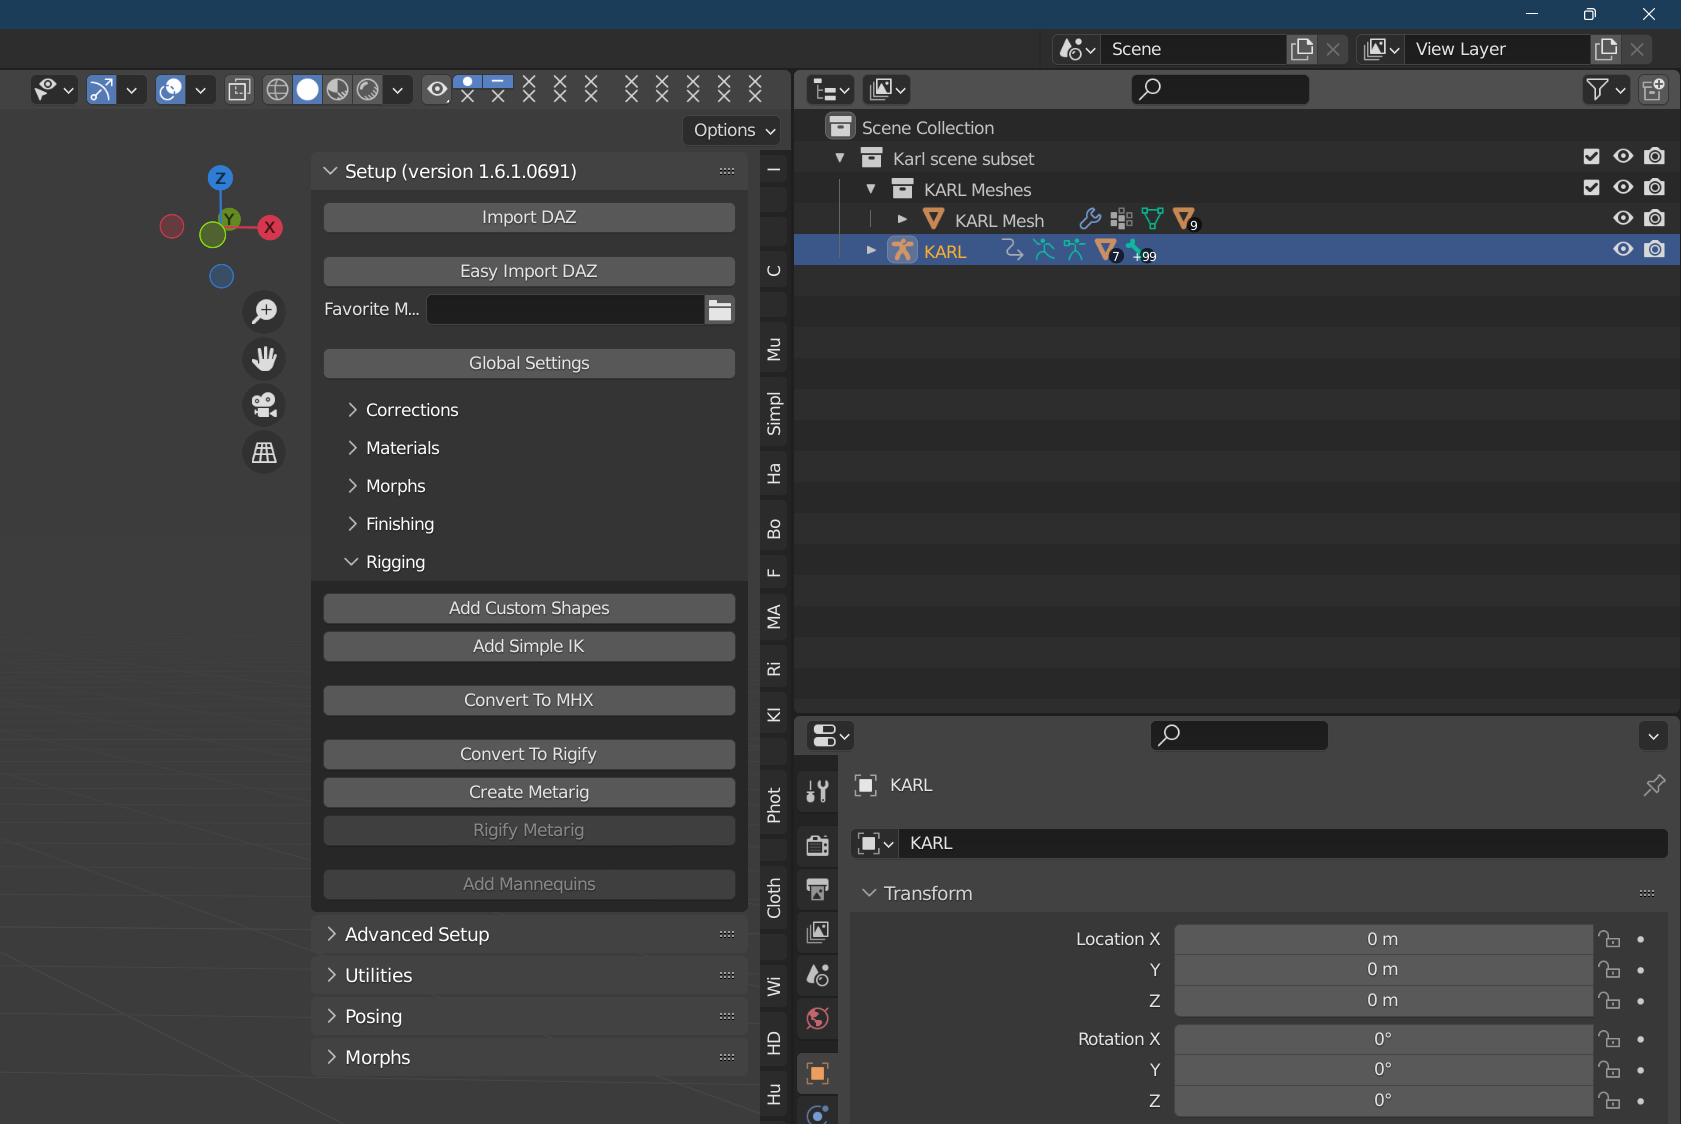
And click on the button marked “Convert To Rigify”:
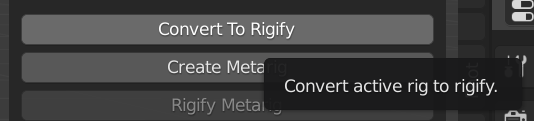
Here are the options I’m using. Feel free to experiment. If you mess up remember you saved that .blend file out in that previous step! (If you didn’t, now might be a good idea to press [Esc] and cancel out of this and save your .blend file now! Just saying!)
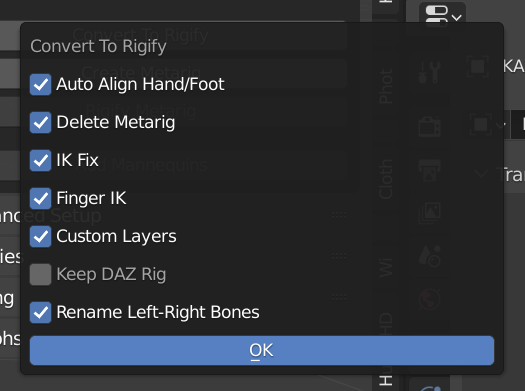
When you’re ready, click OK.
Notice I’m not keeping the DAZ rig. I hate the DAZ rig. But it’s not going to hurt anything if you want to keep it. Something actually may require it. Who knows. I haven’t come across anything that does yet. But the option is there.
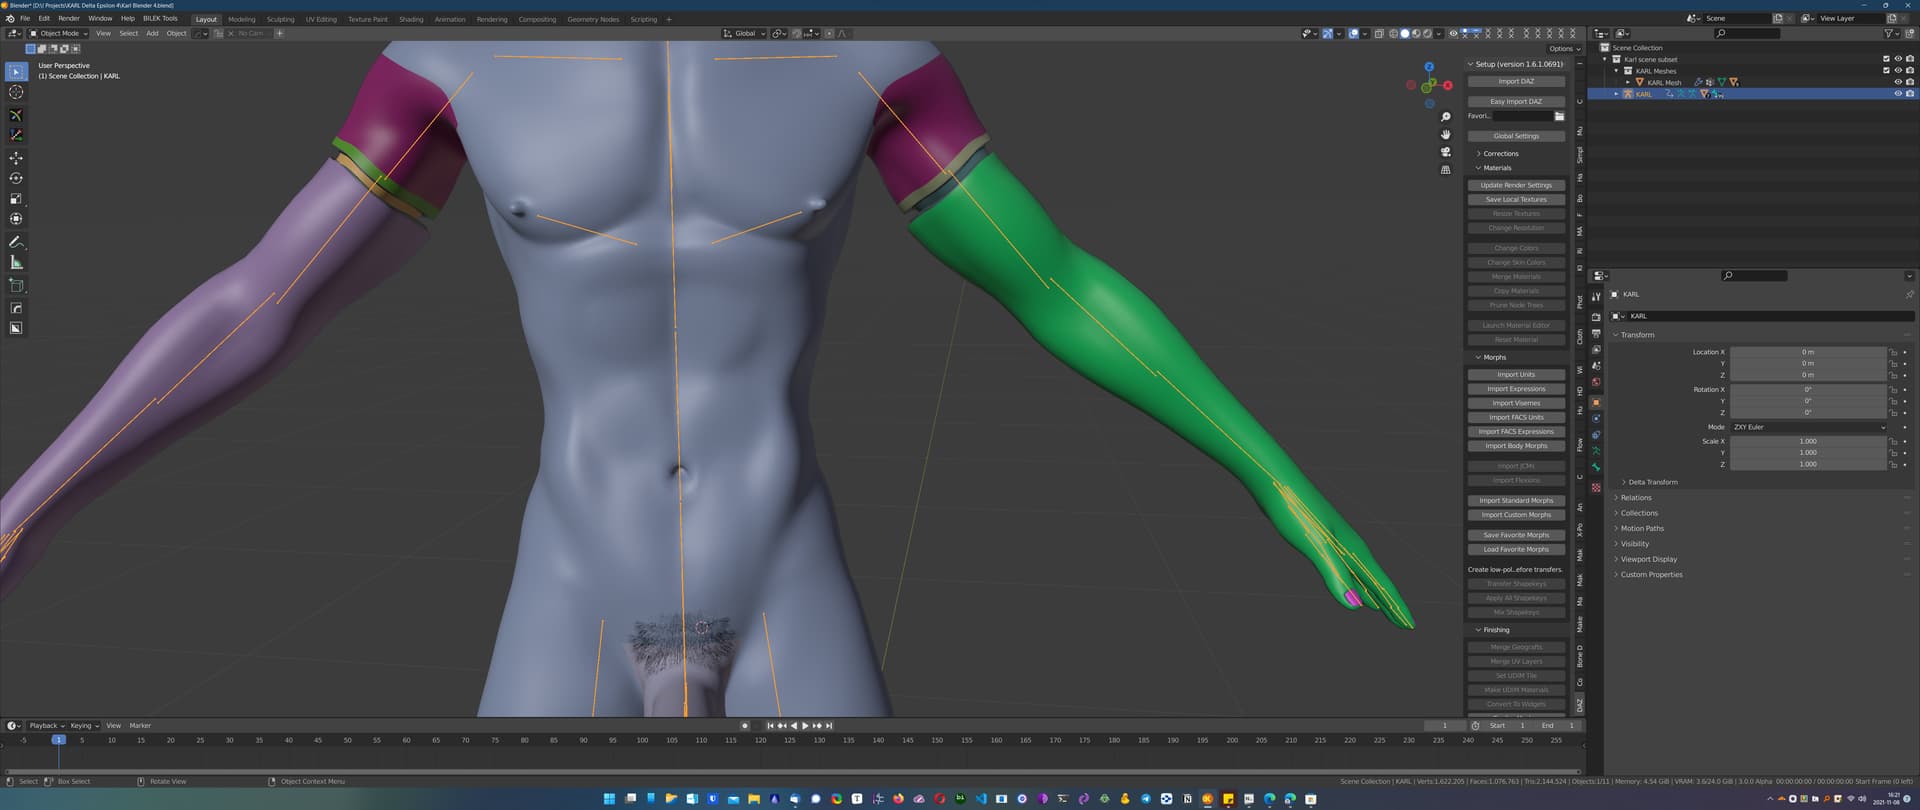
After a few moments your screen will magically change and gone will be your DAZ rig and you will now have a Rigify rig instead.
Like I said earlier, rigging is a preference. You may prefer the DAZ rig. You may prefer the MHX rig. There’s no right or wrong rig type here. Feel free to experiment! That’s the fun of Blender!
Alright, are we ready to see how things look?
Are we ready to see how things look now? Up until now we’ve been looking at a random-colored smooth shaded version of our figure. Now might be a good time to actually see what it looks like, eh?
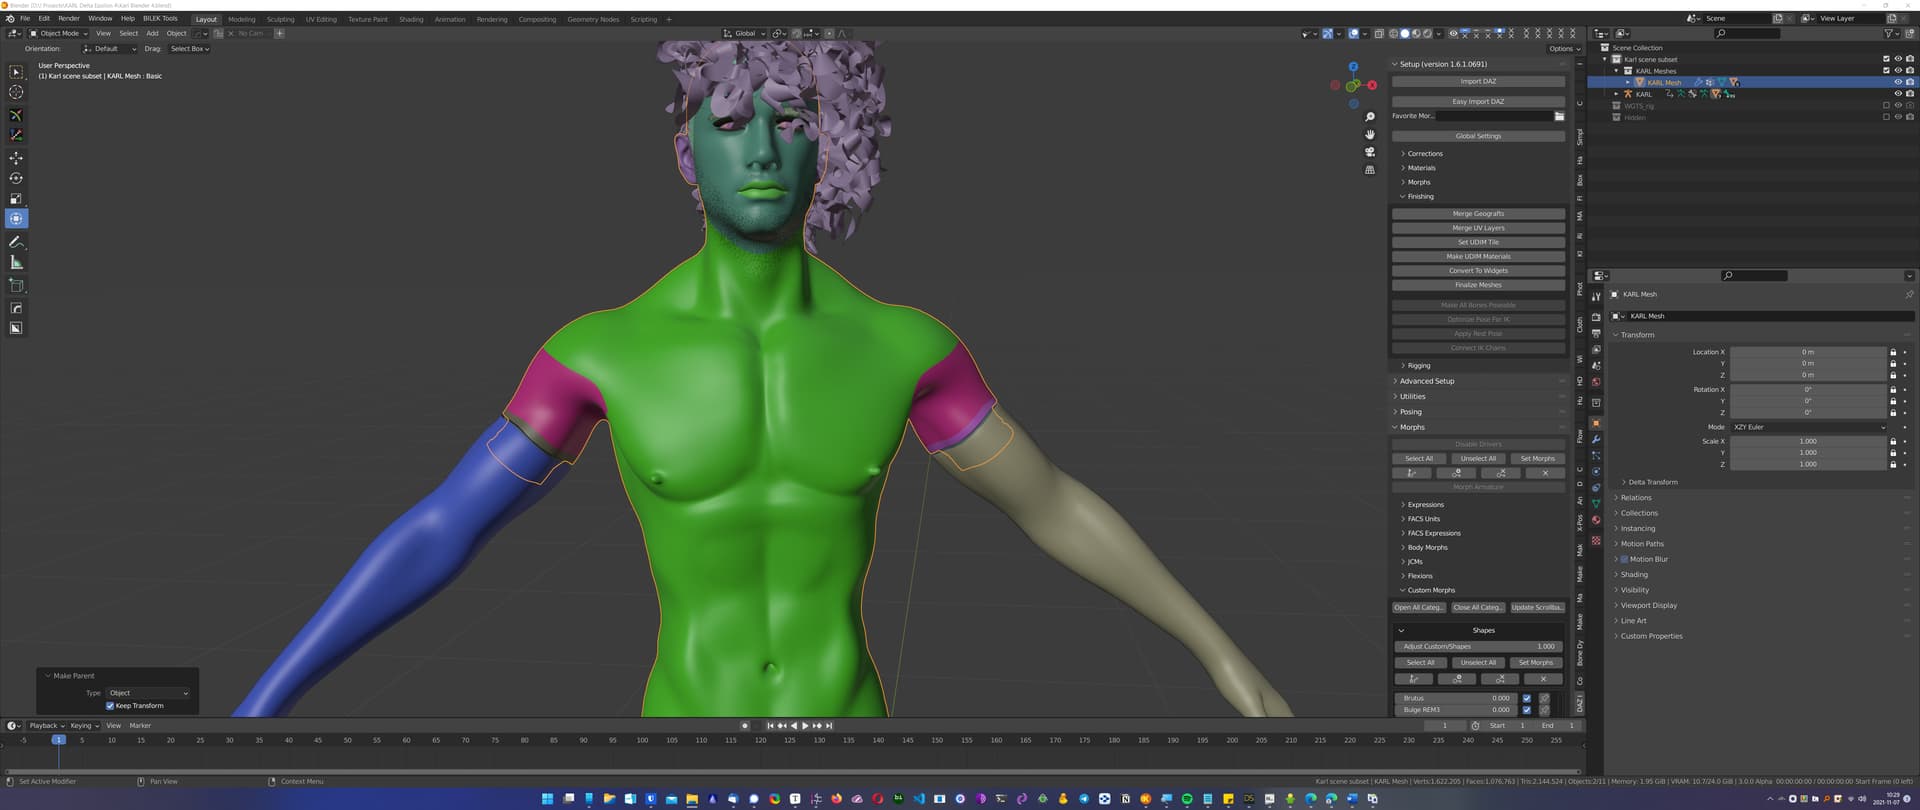
Go ahead and switch to Cycles Render Preview:
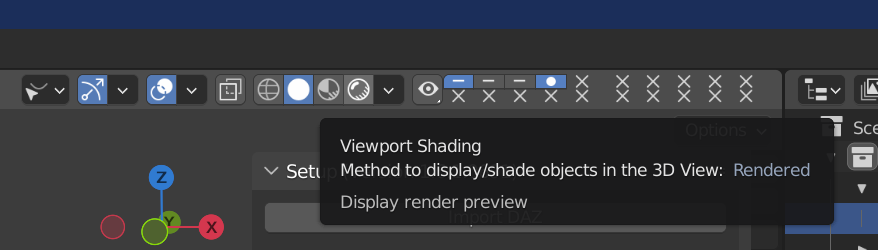
It is the last button on the right here.
Go ahead and select it and sit back. Your GPU might spin up. It’s got to compile the shaders and materials.
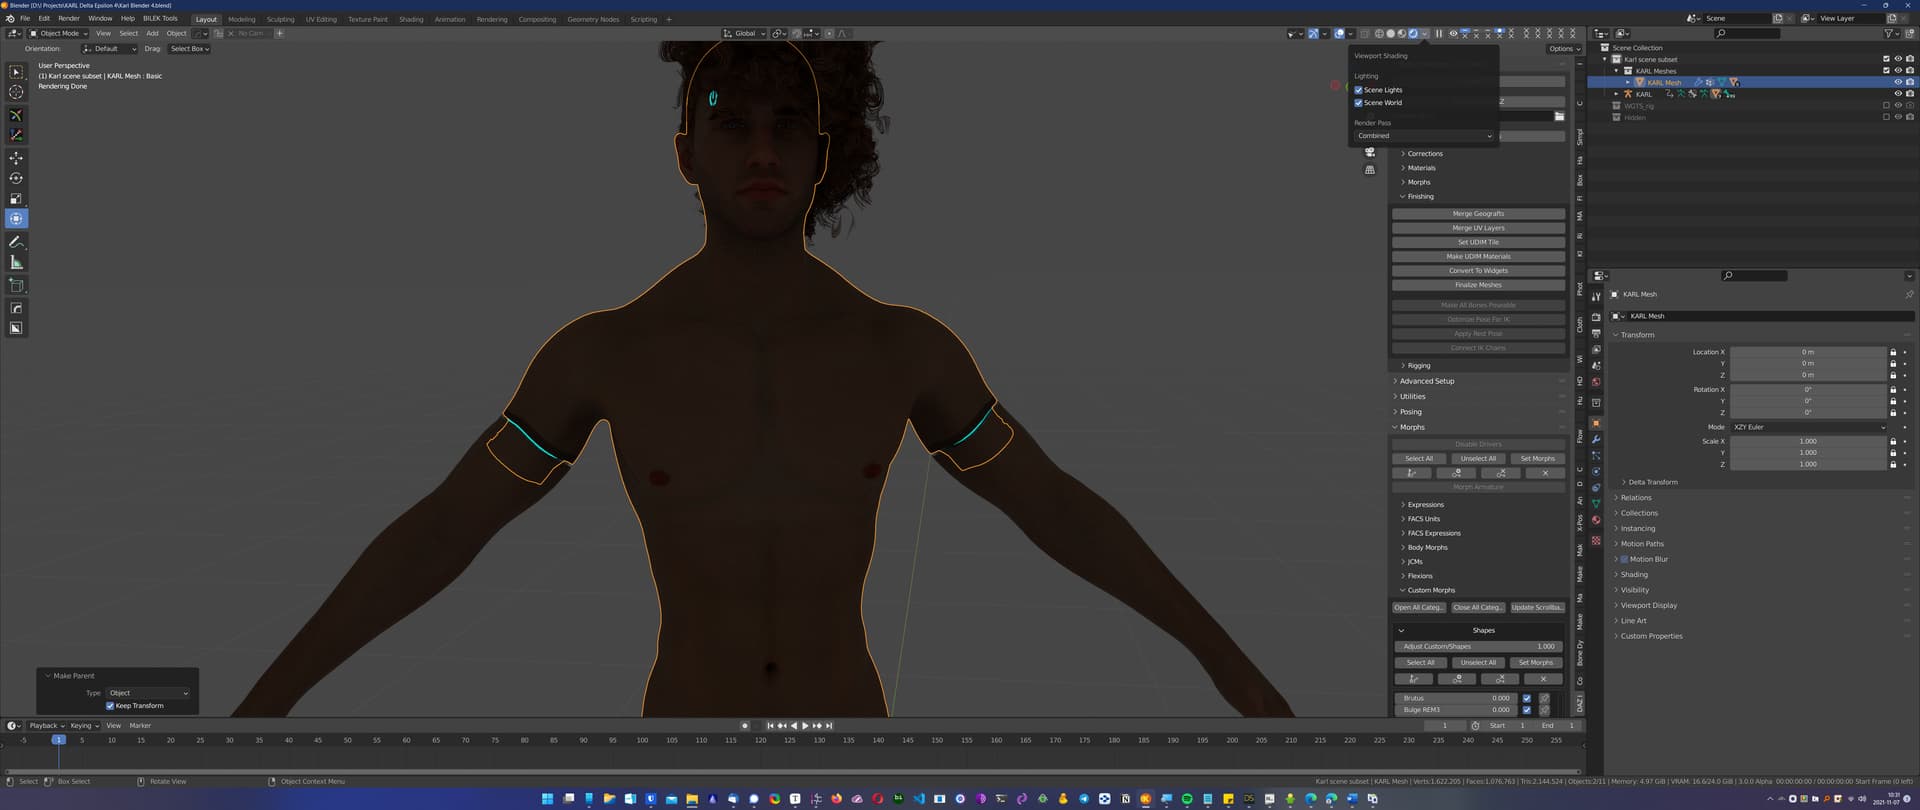
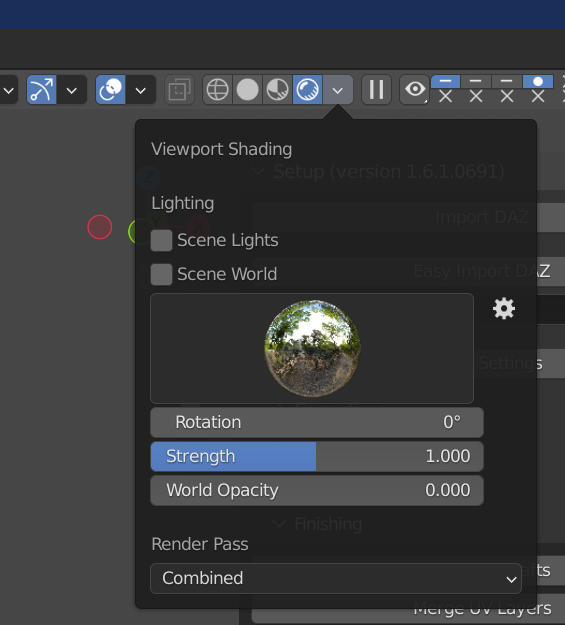
If it looks kinda dull, well that’s because we don’t have any lights or cameras in our scene! So go ahead and un-check Scene Lights and Scene World options. ![]()
Much better!
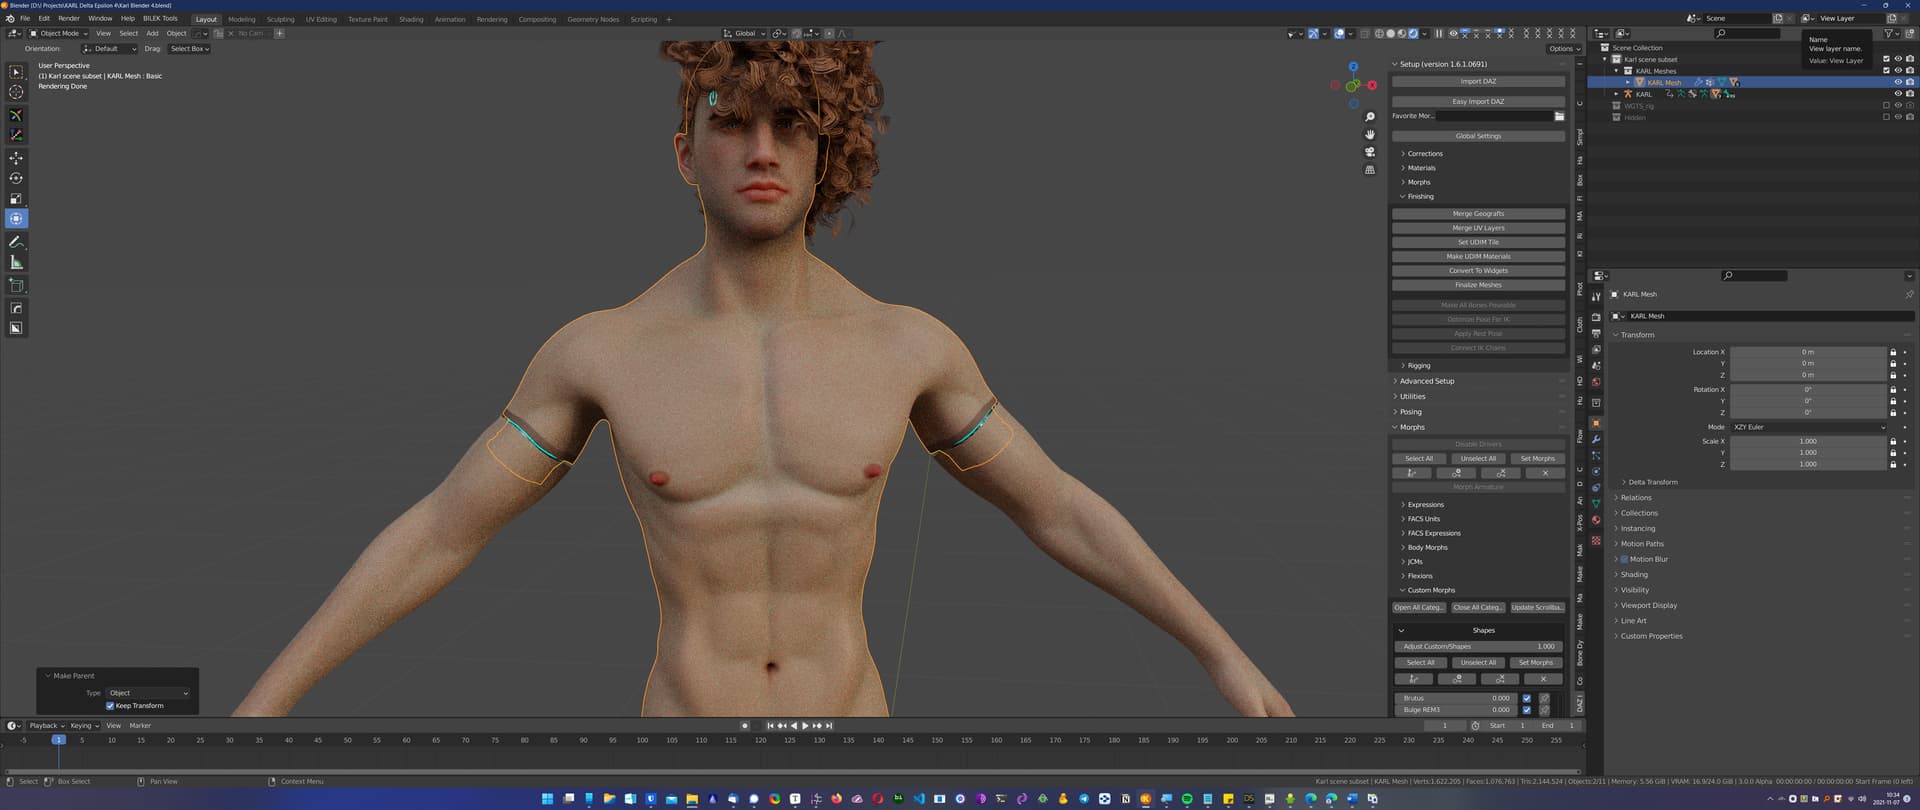
Not bad! What do you think?

You know what I’m going to do right now? Yep! Save the .blend file. ![]()
Karl Blender 5.blend.
Are you seeing a pattern here? I know all these .blend files are starting to add up. On my system each of them is almost 300MB in size. That’s because I tell Blender to pack everything required to render a scene into the .blend file. But disk space is cheap, and I can always go back and delete the files later if I need to free up some space.
It’s just a good habit to get into. Trust me on this!
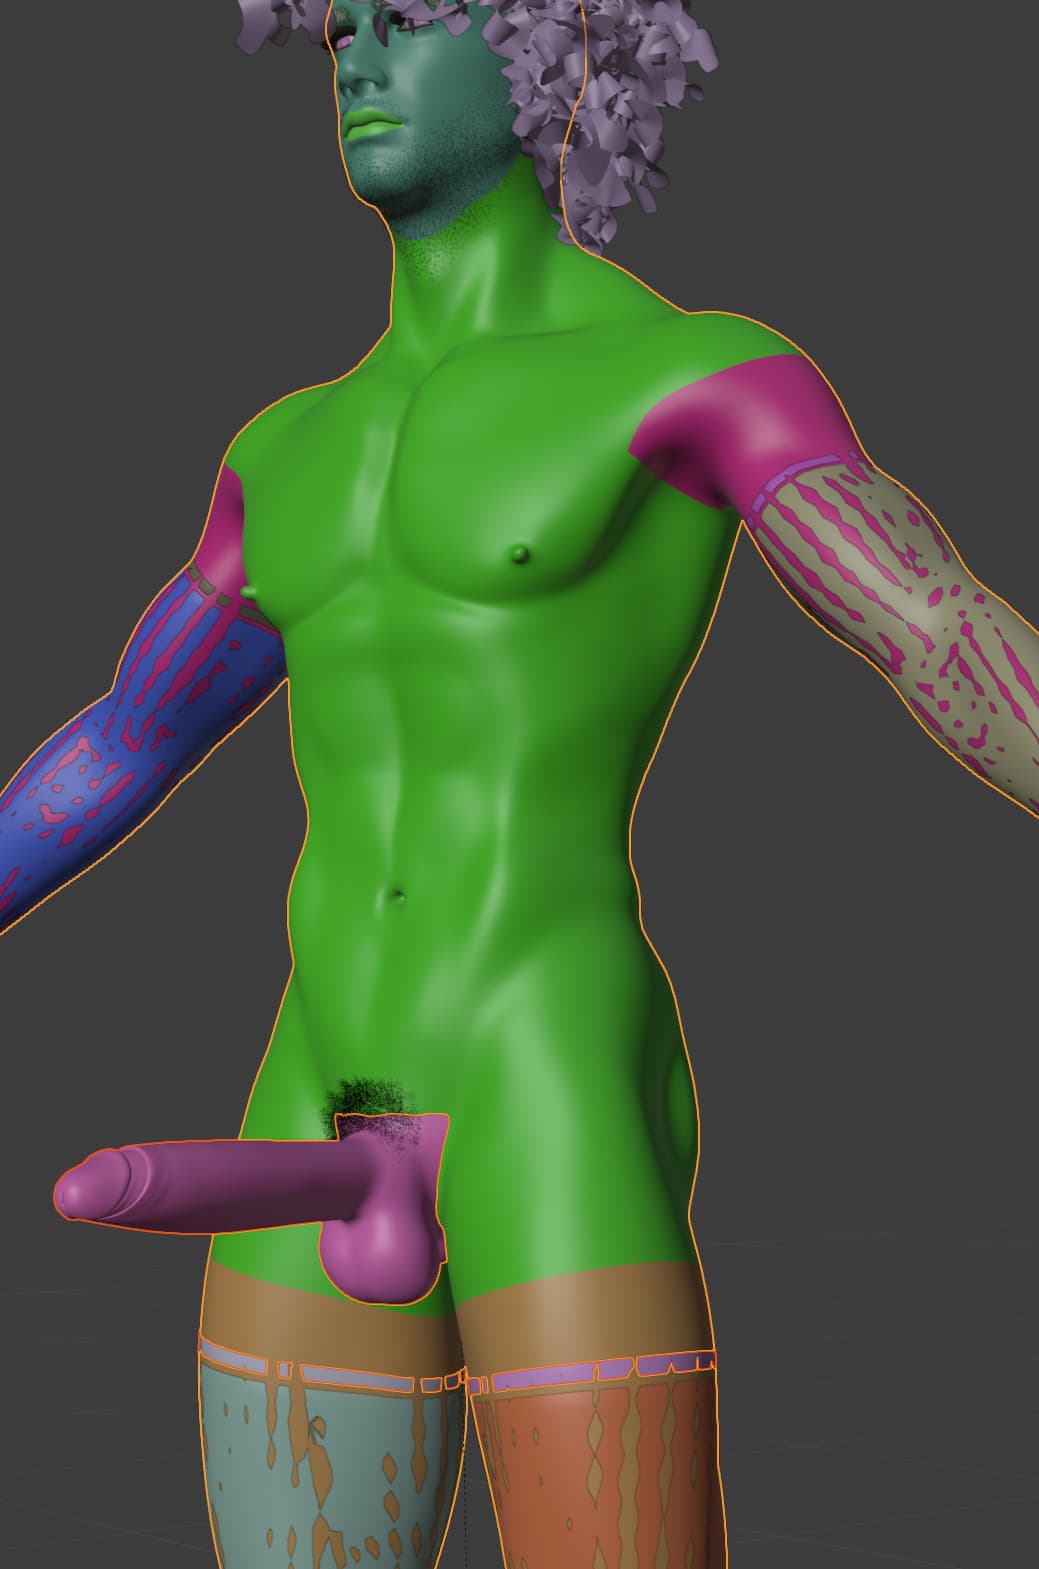
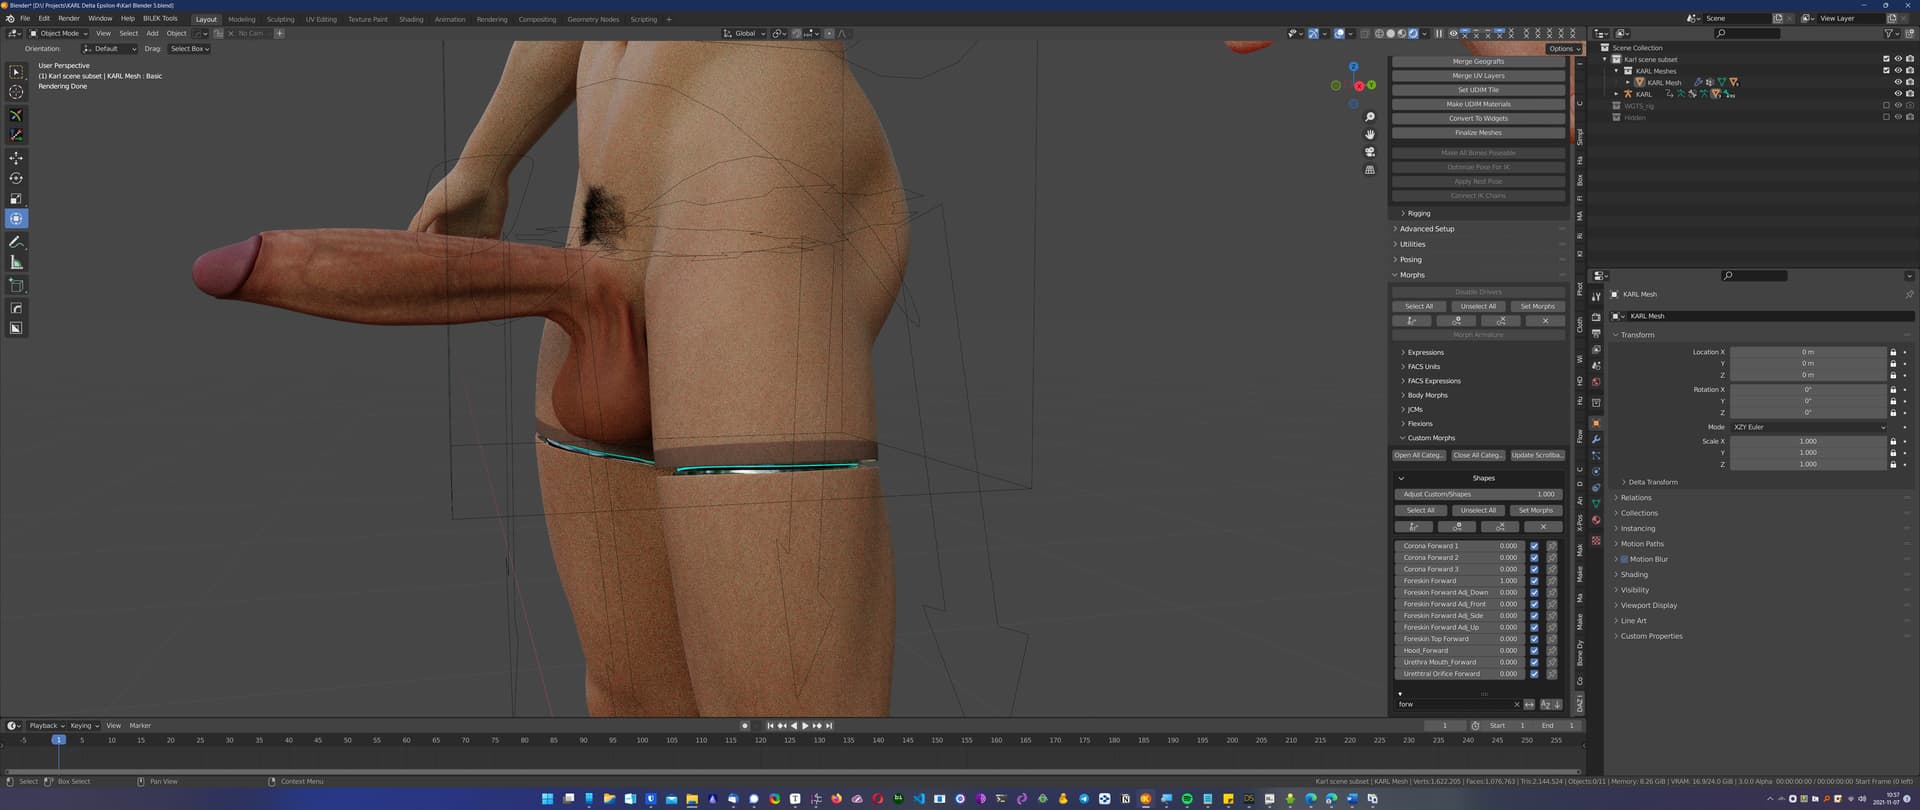
Restoring the genital morphs
Remember I took a screenshot of the currently used parameters way back in the beginning before I saved out the Scene Subset file? We’re going to use those Currently Used Parameters to re-dial back-in Dicktator here in Blender.
It’s not 100% but it’s close enough. I don’t think I installed all of the morphs I needed to install but I’m not going to worry about it for this tutorial. The good news is I have a backup that I saved earlier so I can quickly go back and fix things if I want to!
So here’s the final.
So now we need to pose things. Frankly that’s a completely different tutorial. I’m not going to go into too much on that but I do want to show you one thing.
I’m going to save out my .blend file though since I’ve dialed-in a bunch of morphs.
Karl Blender 6.blend. ![]()
So that’s it. Hope you found this useful.
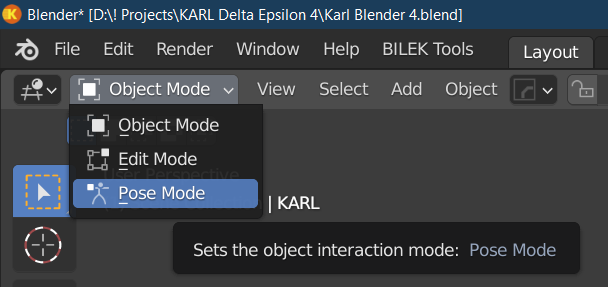
Next tutorial I’ll go into posing. ![]() But if you want a quick head start, just select the armature and use the drop-down in the top-left of the 3D workspace and switch from “Object Mode” to “Pose Mode”.
But if you want a quick head start, just select the armature and use the drop-down in the top-left of the 3D workspace and switch from “Object Mode” to “Pose Mode”. ![]()
I’m stopping the tutorial here because I’m having an issue with one of Dicktator’s bones (shaft1) is refusing to rotate and I’m trying to see if it’s a problem with Blender3 or not so I’m going to reproduce all this with Blender 2.93.
 Can’t wait for the Pose tutorial ahah
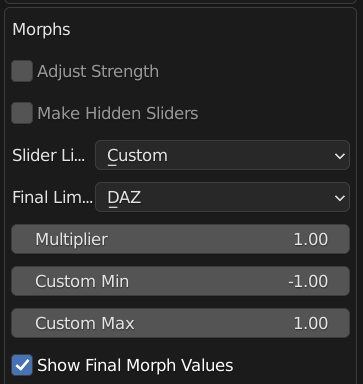

 Diffeo definitely got a lot to offer and I’m learning more and more every time I use it
